
It’s been a while since the last update. Further, there has been absolutely no progress on the car. Which is not to say there has been no progress!
You will recall regular whining every winter about the workshop being too cold. As well as whining about lack of storage and general complaints about organization and overall work environment.. And regular pronouncements of “I have to get this place insulated and sheetrocked!”. And organized. And generally cleaned up.
I was finally directed by She Who Must Be Obeyed to “just get some people to come in and get it done”.
The workshop was framed with 2×6, so we were looking at R19 insulation for the walls, R49 for the ceiling, and 5/8″ fire rated drywall. Yes, the workshop will end up better built and better insulated than the house. I asked the contractor who originally built the workshop for recommendations for good insulation and sheetrock people, called them, and got estimates. Expensive, but all the indications were that they could do a good job. Time to arrange a transfusion for the checkbook, schedule the work, and start Project Workshop Interior.
Unfortunately the first step in the project was to completely strip the workshop down to bare studs and empty it out. Everything had to come down off the walls. Everything had to be moved somewhere else – the garage, the shed, and the basement received most of the piles.
I scheduled two weeks for workshop cleanout and prep. By working long hours I actually managed to finish up the day before work was supposed to start! In addition to taking things out, the gable ends needed to be framed out to make the end walls flat from floor to ceiling. More CAT6 networking cable needed to be run – I ended up with 12 Ethernet ports in the workshop. This may be overkill, but it is convenient to have networking where you need it.
For organization, sanity, and being able to find things, the best place to store the Imperial parts was on the car – so the car had to go back together. Bumpers had to be installed, large quantities of trim had to be installed, the hood had to go back on, and various other parts and pieces had to be located and bolted back on. After all of this the car was backed out of the workshop and covered with a car cover for the duration of the project.
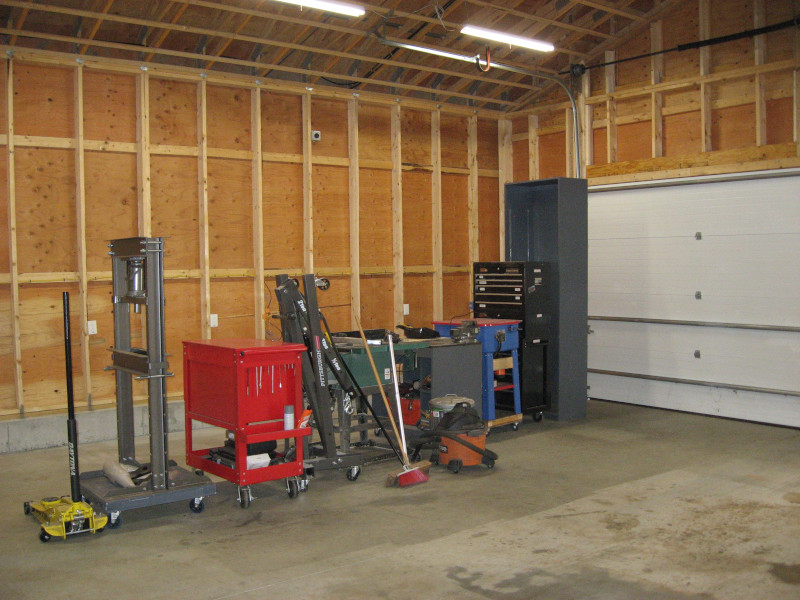
A number of things had to stay in the workshop. Fortunately these were on wheels so they could be moved around as needed by the construction crews.
The insulation crew filled the walls with Fiberglas insulation. They then added baffles between the soffit and the roof, stapled a cloth backer to the bottom of the roof trusses, and blew 15″ of cellulose insulation into the attic.
When the inspector showed up the conversation could have gone badly:
Inspector: “First of all, I see a bunch of new work electrical boxes but no electrical work on the permit”.
Me: “All the electrical work was on an earlier permit”.
Inspector, checking records online: “There is an electrical permit from July for a generator interlock but nothing about wiring”.
Me: “Check the one before that”.
Inspector: “OK, here is a permit from 2017 for electrical service, electrical panel, and general wiring of the workshop. It is completely signed off with rough and final inspections. Looks like you are good to go on the electrical”.
The sheetrock people told me that all of the lights and electrical covers had to be removed. The wall outlets weren’t bad, but taking down the lights from the 16 foot high cathedral ceiling was work. When the sheetrock crew showed up to drop off staging and supplies they told me that taking the covers off the electrical outlets was a good start, but that the actual outlet had to be removed from each box to allow them to cut out around the boxes for the sheetrock and to apply the plaster.
Of course I have 28 electrical outlets and 7 network outlets in the workshop. A long evening was spent removing all of these.
I’m always amazed at how fast a professional sheetrock crew is. Two people came in and did the entire workshop – a 28′ x 28′ building with 11′ high walls, 16′ cathedral ceiling, over 40 outlets of various types, with heavy 5/8″ drywall (120 lbs per sheet) – in ONE DAY!
Common practice in New England is to skim coat the walls with plaster rather than just mudding the seams. It took four days for the plaster team to finish. The final result was great – flat walls ready for paint. Well, after letting the plaster dry for 4-5 days…

I got a quote for painting that was over 3X what it would cost me to do it myself. The quote was for 2 coats of white on the ceiling and 2 coats of off-white on the walls. I wanted something a bit nicer than that. And I wanted help with all of the high work on electrical, lighting, and heating.
Step 1: rent a scissor lift.
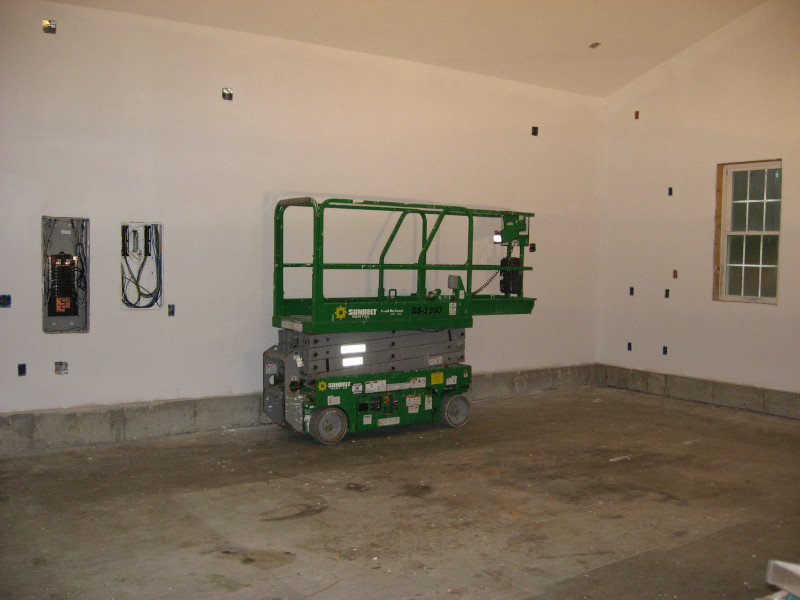
This particular lift will go up to 19 feet tall, so it easily handles the 16′ cathedral ceiling in the workshop. The working platform is about 8′ long giving plenty of room to work. The lift goes to exactly the location and height needed, enabling you to paint huge areas in little time.
With the scissor lift in the workshop it was time to:
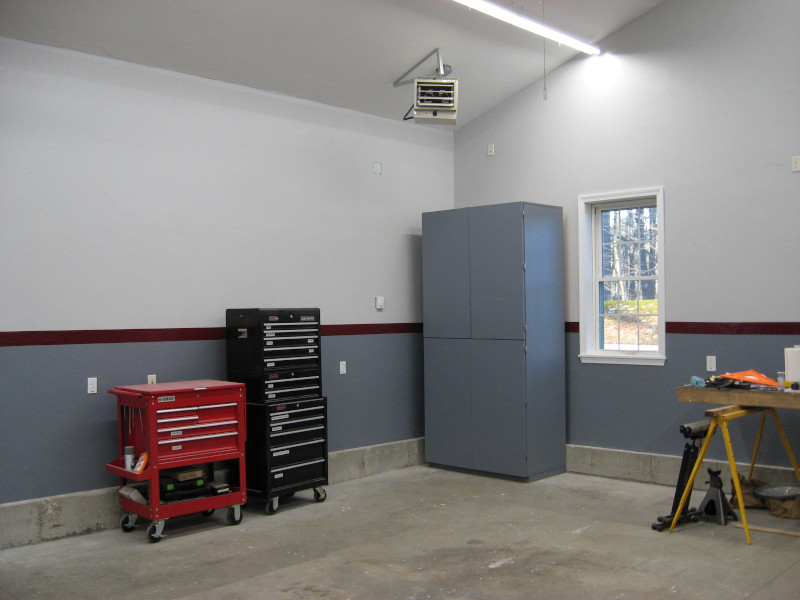
- Apply 8 coats of paint (primer and two coats of Ceiling White to the ceiling, primer and two coats of light gray to the walls, and two coats of darker gray to the lower walls.
- Re-install all of the electrical outlets, including the 7 in the ceiling.
- Re-hang the 4′ LED shop lights. Upgrade from the original 10 lights to 16 lights making the shop much brighter.
- Re-hang the ceiling fan.
- Re-hang the heater from the ceiling.
This would have been almost impossible to do from a ladder. After this experience I will always get a lift for large jobs!
One other thing – I had seen pictures of two tone paint jobs with a red dividing stripe that look really sharp. It turns out that you can get vinyl stripes – the same vinyl used for outdoor signs – for $50 for a 100′ roll. These install quickly and easily, taking less than a half hour for all four walls.
Do the trim around the windows and the door and you end up with a finished workshop ready for for further customization.
I’m quite happy with how this turned out! More updates to come on storage, new equipment, and arranging an effective working environment.
Next: Workshoppery Storage