
After making progess on the brakes in Stop It III plus More Good News it is time to turn.
Old steering wheels, especially from the ’50s and ’60s are horrible – cracks, gaps, splits, and missing pieces. My steering wheel was no exception.
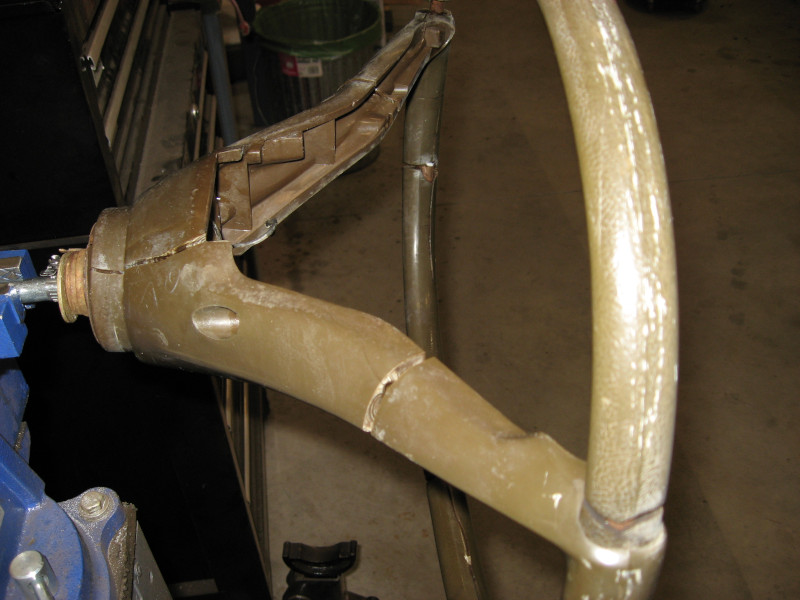
Unfortunately this is just a fact of life. The plastic in the steering wheel shrinks over time and becomes more brittle. The steel core of the steering wheel doesn’t shrink. Something has to give, and it isn’t the steel! It is almost unavoidable – old steering wheels crack.
Fortunately, something can be done about this! Unfortunately it is a lot of work. Even more unfortunately I also managed to screw up some things I shouldn’t have touched…
There are actually books on repairing old steering wheels – like Steering Wheel Restoration Handbook. Eastwood even has a kit for steering wheels.
With the kit in hand, instructions read, and steering wheel off the car it was time to start. The first step is a good cleaning: a good scrub in the parts washer to clean off 50 years of grime followed by a wipedown with Prep-Sol.
PC-7 epoxy is the recommended material for filling in cracks and gaps. It works well, but is sticky and stringy. This makes it a bit challenging to work with.
The procedure is to fill in the cracks and gaps, let it set, then file, grind, and sand it down even with the rest of the steering wheel. Or where the rest of the steering wheel should be…
At this point you discover that you haven’t completely filled in the cracks flush with the surface, so you repeat the process. You repeat the process over and over, getting closer each time. I did four or five coats, with each coat requiring more time finishing and matching the surface to the original steering wheel. A die grinder with a sanding disk works great for rough adjustments, along with hand sanding for detail work.
PC-7 is great for bulk filling of gaps and cracks but doesn’t do a great job of making a finished surface – the sticky and stringy nature of the epoxy makes it difficult to do fine work. The next step is to get out the auto body filler, add it over the PC-7, and grind and sand it down to a smooth finish. It took four rounds with the auto body filler to get something I was happy with. Each coat got closer, having to look more and more carefully for the final imperfections.
The next to last step is to spray the entire steering wheel with high-build primer and sand it down with 220 grit and 400 grit sandpaper. After two coats of high-build primer and careful finish sanding the steering wheel looked great! However it was a dull gray.
They don’t make standard paint to match the steering wheel color, so I took a piece of dashboard trim to the auto paint store and had them use their color matching spectrometer to mix up a quart of paint the same color as the rest of the dash.
In the paint booth of the WorcShop I applied four coats of paint to the steering wheel to give it a durable finish. It looks great installed in the car!

Now for the confession of how I made life more difficult for myself: on the back of the steering wheel there is a copper disk that provides power for the horn. It is held in place by a cap, and the cap has two ears that operate the turn signal return. The insulating material for the copper disk was badly decayed, so I took everything off to replace it.
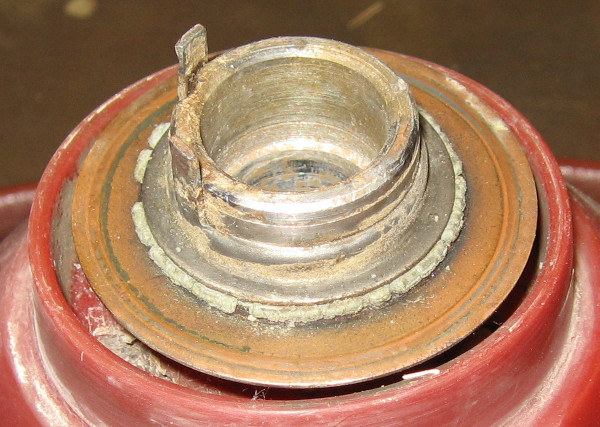
Bad idea. Very bad idea! After doing this I wasn’t ever able to get the cap back in place properly. In fact I managed to damage the turn signal return ears and damage the turn signal switch itself. The expedient thing to do was simply remove all of this and live without a horn or automatic turn signal return. Which I did.
That was a short term fix. Long term I have to have a working horn and turn signal return. I was able to locate another steering wheel, but was warned it was in poor condition. When it showed up it was indeed in poor condition – even worse than the original steering wheel. Well, at least it was cheap!
As I contemplated starting the restoration process on the replacement steering wheel and examined the retaining cap – which I was NOT going to touch! – I realized that I could get the critical dimensions off of the replacement steering wheel. I decided to make one last effort at getting the original steering wheel to work.
I cut out new tabs and welded them to the old cap. I made insulators for the horn power ring out of rubber sheet and electrical tape and fitted the horn power ring in place. Since the old cap had been falling off, I added epoxy to the inside of the cap and then used a section of pipe of the proper diameter to drive it into firm contact with the horn power ring insulator.
As intended, the turn signal return ears stuck up too far. With the untouched replacement steering wheel for reference I could measure how far these ears should stick up, transfer this measurement to the original steering wheel, and grind the ears to the proper length.
Everything should now work. With the steering wheel bolted to the steering column, check to see if the little brass wheel is properly riding on the horn power ring. It is! And it continues to ride on the power ring as the steering wheel is turned.
Now to the turn signal. The ears don’t dig into the switch, which is good – they aren’t too long. But are they long enough? Left turn signal, then steering wheel to the right – and the turn signal cancels! Right turn signal, steering wheel to the left – and the turn signal cancels!
Great! Everything is working! Put the rest of the steering wheel assembly back together, hook up the horns, and press on the horn. Sounds of silence…
Troubleshooting determined that the horn switch in the steering wheel is working, the horns themselves are working, and the horn relay is dead. A new horn relay is on order which should lead to everything actually working. Test drives confirm that the automatic turn signal return is working, so I don’t have to worry about manually canceling the turn signals any more.
Update: it was the horn relay. A new relay has the horns beeping enthusiastically.
Next: Aligned Inspection