
Electrical 6: I Need Power! described the installation of the new fuse/relay box and rough wiring. The next step was to complete the headlight wiring by installing a Weather Pack 4 pin connector on the new wiring harness.
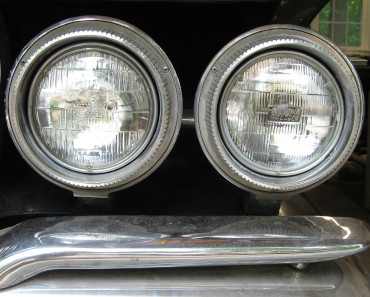
I may have slightly overstated the status of the headlight wiring… While the new wiring is indeed 12ga, it doesn’t run all the way to the headlights. There is a separate run of wire from the main harness to the headlights. Recall that one of the defining features of 1961-1963 Imperials is the podded headlights.
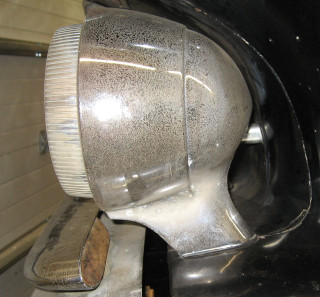
The wiring runs up from the bottom of the headlight through the base, into the pod, and then through a connecting bar between the two pods. There is minimal space for the wiring – getting four 12ga wires in here will be a real challenge. So I decided to punt on this for the moment by re-using the existing headlight wiring and building an adapter between the new wiring harness and the existing headlight wiring. The headlight wiring will be updated when I have the headlights out for painting or when I send them out to be re-chromed.
While re-using the existing 16ga three wire setup isn’t ideal, the remaining 16ga wire is short and the upgrades to the rest of the system help a lot.
The existing headlight connector is a 3 pin Packard 56 connector. Of course I have 1 and 2 pin Packard 56 connectors, but no 3 pin. Not a problem – cut the existing connectors off of the old wiring harness leaving a 3″ pigtail. Then crimp Weather Pack connectors onto the ends of the old wires and install in the mating shell for the new wiring harness. As long as everything is opened up, go ahead and spray the old connectors with contact cleaner. Viola, or maybe even voila, and the headlights are plugged in and working.

In this picture you can see the four 12ga wires of the new harness going into the sealed Weather Pack connector, the three 16ga wires from the original harness, the the three wires going to the headlight. Also shown are the green and yellow wires to the parking and turn signal lights.
The headlights are now substantially brighter than they were before. Thanks to the relays and new wiring I no longer have to worry about the old wiring or the old headlight and dimmer switches. The headlights had already been upgraded from the really old incandescent bulbs to the somewhat less old sealed beam halogens. A planned upgrade is to replace these with modern H1/H4 lights – this will probably be done when the headlight pods are rewired.
A couple of other notes on the headlight wiring: 35 amp relays were used; this makes sure that the relay is not the weak point of the system. Even using 65 watt bulbs, the four high beam headlights will only be pulling a total of 20 amps. 100 watt HI beams could be a problem, but even then they could be split across two relays. And 100 watt bulbs would probably melt the pods!
This particular Bussmann fuse/relay box was chosen because it supports circuit breakers as well as fuses. The headlights will use these automatic resetting circuit breakers for maximum reliability and safety.
Next: is the Imperial ready for the road? Find out in Cruisin’!
Next electrical: chasing a problem in Electrical 8: RTFL