
Larger fabrication projects, like the drill press stand chronicled in the previous article How Much Does A “Free” Drill Press Cost?, have been leaving me increasingly dissatisfied with my welding setup. The actual welder, a Lincoln HD140, is fine. The issues are with the cheap Harbor Freight welding cart it is mounted on and the way the various welding equipment and supplies are scattered across multiple locations in the shop.
It should be clear by now that I’m really trying to have the workshop organized and effective for the various jobs I do in it. Part of the madness (please accept the premise that there is a method!) is to use closed storage to keep things clean and organized.
After a few weeks of mulling over various ideas a bit of inspiration struck – what about using a two drawer filing cabinet for storage and building a welding cart around it? Good brands of filing cabinets are durable and can handle heavy loads. One of the drawers is large enough to hold a welding helmet, gloves, and jacket, and the other drawer can be organized with plastic storage containers to hold the various tools, parts, and supplies. New filing cabinets are expensive – at least for the good ones – but used filing cabinets can range from cheap to free.
Nothing cheap enough and close enough showed up on Craig’s List, so I headed over to the local Habitat for Humanity ReStore. They had a number of filing cabinets, including a two drawer Hon for $15. A bit beat up, but the drawers opened and closed smoothly. OK, I’m doing this!
When I got the cabinet home I discovered that I might have been a bit optimistic. The bottom was badly dented and some of the re-enforcing brackets were torn loose. Not a problem – first, this is for a workshop not an office. Second, I have auto body tools and a welder and I’m not afraid to use them! Out came the body hammers and dollies and the filing cabinet became much closer to original. The welder made quick work of re-attaching brackets and frame. I could have added auto body filler and made things perfect – but, “workshop”.
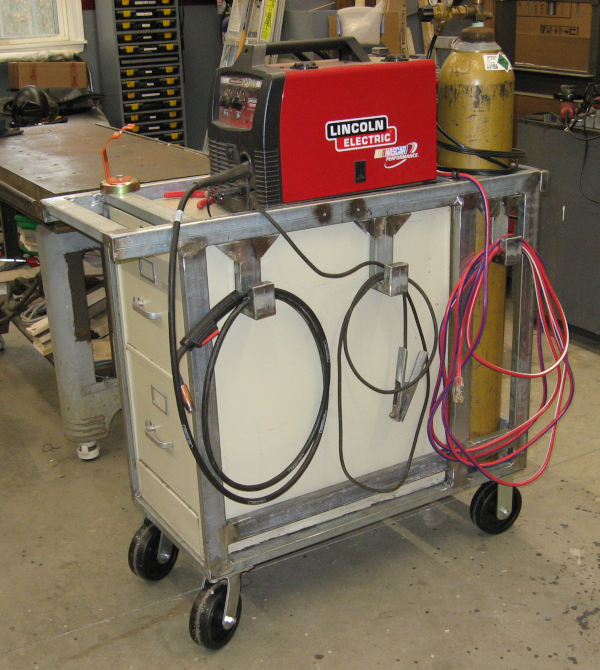
The welding setup includes both the welder and a large gas bottle, so the frame was designed to support both the filing cabinet with welder on top as well as the gas bottle. It was also designed with a handle for pulling it around. I will probably be adding another welder in the future, so the design needed to allow two welders and two gas bottles.
A set of large heavy duty casters were available – the ones from the drill press project that made the drill press too high. That won’t be a problem with the welder. Plus, an easy rolling cart is one of the design goals.
Finally, hangers were needed for the hose going to the MIG gun and ground cable. Since the first thing I have to do when using the welder is grab an extension cord to plug it in I decided to just include an extension cord in the build.
After measuring and making sketches pieces of steel tubing were cut to length, fitted together on the welding table, and welded up. The base was the first thing built: corners were cut at a 45 degree angle and welded together for a finished appearance. Cross beams were welded in place to support the gas bottles and the end of the filing cabinet as well as provide a place to mount the casters.
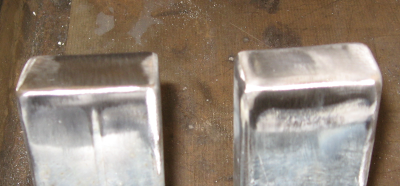
Mitered corners couldn’t be used everywhere. Where the end of a tube would be exposed an end cap was welded in place:


With the base completed the rest of the frame was fitted into place, adjusted, and tack welded:
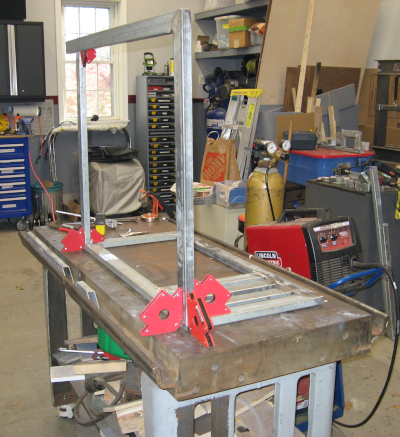
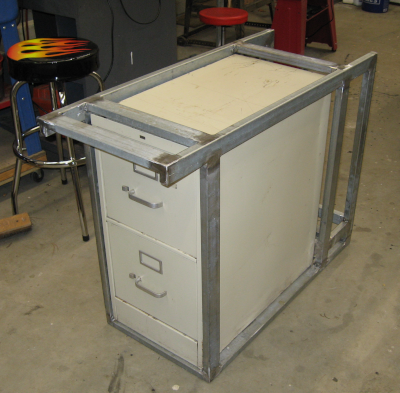
After the frame was tack welded, and before doing final welding, the filing cabinet was test fitted:
Next up was mounting the casters. On the drill press project I welded 1/4″ steel plates to the bottom of the frame to support the casters. With the welding cart I noticed that the cross braces would fully support the casters. The problem is that the 14 gauge steel tubing is too thin to thread for bolts and welding nuts on the outside of the frame is, to put it mildly, ugly.
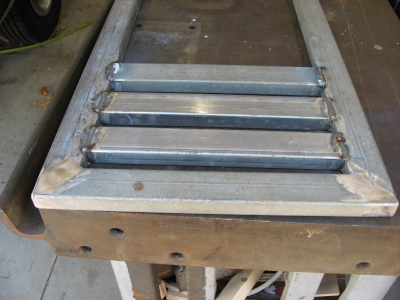
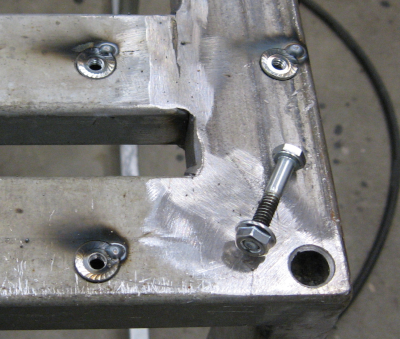
It should be possible to weld an upside down flange nut in place so that the nut is inside the tube. I had been considering various ways to hold a flange nut in place for welding and decided to just make a test piece. It turned out that a step drill would cut exactly the right size hole. Further, if you didn’t run the step drill all the way through the wall of the tubing it would leave a lip that supported the flange nut flush with the outside of the tube!
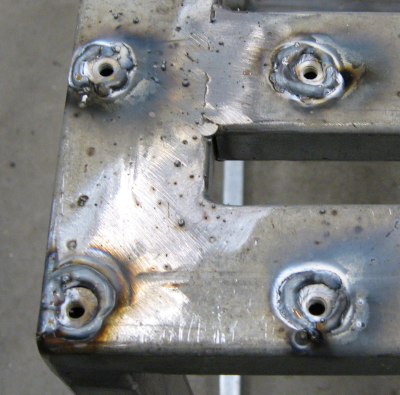
The end result is a nut contained inside the tubing. Welding all the way around the nut provides full strength, making this an attractive solution.
I made a template of hole locations from the casters and used it to locate all the mounting holes in the cart frame. After welding all 16 of the flange nuts in place the casters bolted right on.
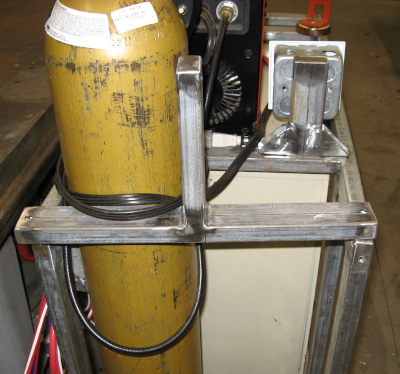
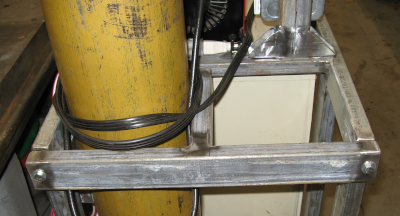
The gas bottles for welding are large, heavy, and dangerous – they hold high pressure gas at 2,000+ psi and weigh 60-80 lbs. You really don’t want them to fall over. They need to be supported at both the top and bottom to make sure they don’t fall over or get out of control. The bottom is easy – just weld in another brace about 2″ off the base.
The top support, on the other hand, can’t be solid. The tanks are too heavy and awkward – not to mention slippery! – to lift five or six feet into the air to clear a top brace. The usual solution is to have a chain that is hooked around the gas tank three or four feet up. Effective but not elegant….
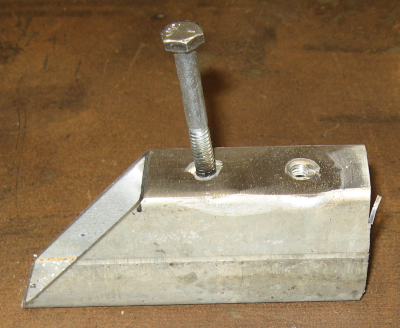
So I designed a removable T brace that would bolt into place using the welded flange nut approach:
At this point the welding cart was done and ready for paint. Or was it…. Painting makes it difficult to change – I’ve run into this with the drill press where I wanted to change a few things but it is just too much work to remove paint, weld in new pieces, and try to repaint and blend. I decided to use the welding cart for a while and make sure no further changes were needed before painting. This has already proved to be a wise approach!
I tried several approaches before coming up with cable hangers I was happy with. The final design is overkill – each hanger is made of six pieces welded together and bolts to the cart frame using the flange nut approach. This final design is sturdy, doesn’t stick out more than necessary, and can be changed later on if needed – for example, a second welder would add more cables that need to be managed.
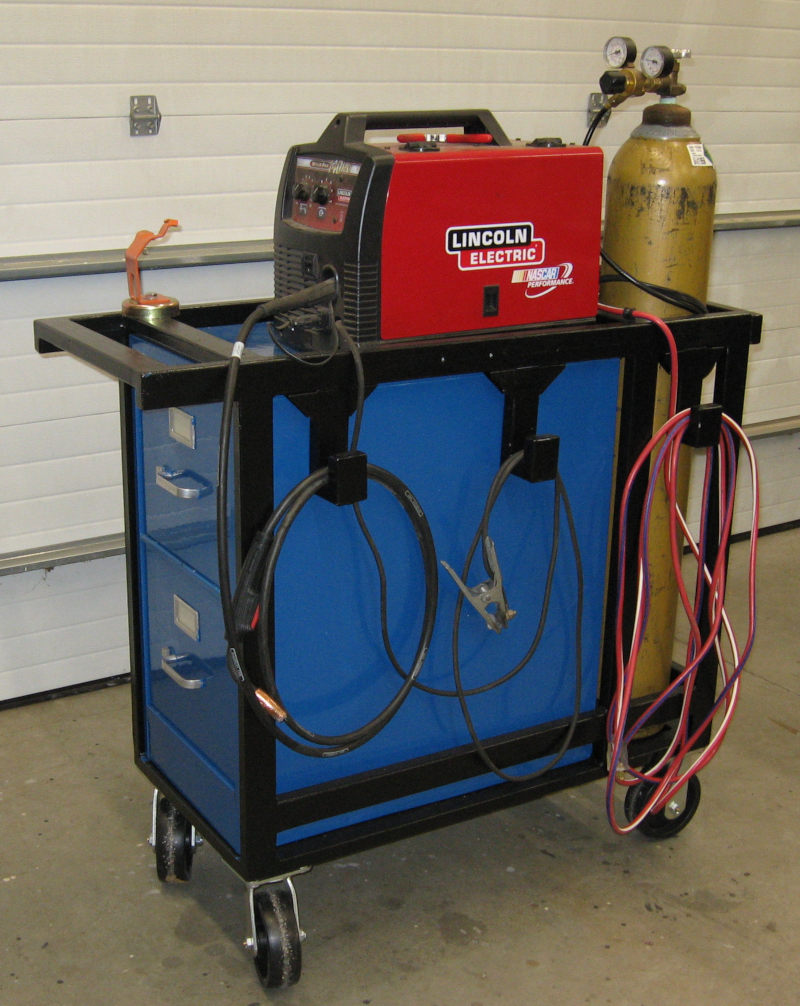
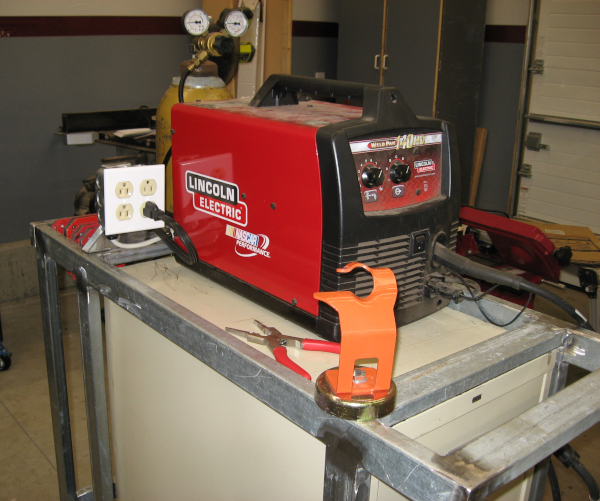
The final bracket supports the quad electrical outlet. As previously mentioned an extension cord is now part of the welding cart allowing the welder to be plugged into it full time. This also provides power for other tools such as lights or grinders. The orange object is a magnetic holder for the MIG gun – it is easy to grab it and stick it on the welding table or whatever I’m working on to provide a handy place to secure the MIG gun.
At this point the welding cart is “done”. I’ve used it a few times and it is a definite improvement over the previous cart – it is much stronger, better organized, has the storage I need, and is (hopefully) future resistant. I really like being able to easily drag it where needed and grab the welding helmet, gloves, and jacket directly out of the cart – and then put everything back up when the job is done! It is also nice being able to find the various tools, accessories, and supplies.
Some big fabrication projects are coming up in the near future – it will be interesting to discover if any further changes or modifications are needed! The cart will ultimately be painted – probably when it is time to paint the next project.
Update:
After using the cart I decided no changes were needed so I went ahead and painted it. It is working out well – I especially like being able to plug it in (with the included extension cord) and grab the welding helmet and gloves out of the top drawer.

Next: keep the building trend going with a Workbench.