
Its not a workshop without a workbench! Currently the workbench is a plywood top laying on a couple of 44″ tool cabinets which has been waiting for the materials to build a proper workbench. With materials in hand, courtesy of Steel This!, it was time to get going. The inspiration for this project is a Steevo Bench as covered on the Garage Journal website. Yes, this is another bad influence from Garage Journal…
The Drill Press and Welding Cart projects were warm-up for building the workbench. Design goals for the workbench included:
- Built around two Harbor Freight 44″ tool cabinets and a Sears 26″ cabinet.
- Lower than the current workbench – basically build it as low as possible.
- Adjustable feet so the workbench top can be level.
- Use the 1″ x 2″ steel tubing also used in other projects.
The two Harbor Freight cabinets were purchased with this project in mind. The Sears cabinet is one I’ve had for about 20 years.
The current workbench – a piece of 1/2″ plywood sitting on top of the Harbor Freight cabinets – is too high and interferes with the electrical outlets. The casters on these cabinets are 7″ tall, so the bench can be lowered up to 7″. The steel tubing frame goes around the cabinets with frame members above and below the cabinet. Using the 1″ x 2″ tubing on its side, the top and bottom pieces add up to 2″. Add another half inch to this for clearance gives 2-1/2″. The leveling feet are made from 5/8 steel plate with a bolt running through it, so the plate plus bolt head is about an inch. This adds up to 3-1/2″, meaning that the workbench top can be dropped over three inches.
All measurements were checked, double checked, and checked again. And then were test fitted multiple times while building out the bench. Steel tubing was cut to length, fixtured up on the welding table, and welded into place. An overhand was added to the back of the frame to accommodate the lip on the concrete foundation.
The adjustable feet are made from 1/2″ bolts. I have mentioned the 5/8″ thick steel plate that came with the steel tubing. This was cut into 3″ lengths, drilled and tapped for the 1/2″ bolts, and welded to the bottom of the frame. The bandsaw had no trouble cutting this heavy plate and the drill press made short work of the holes. I’m getting spoiled by a decent fabrication environment!
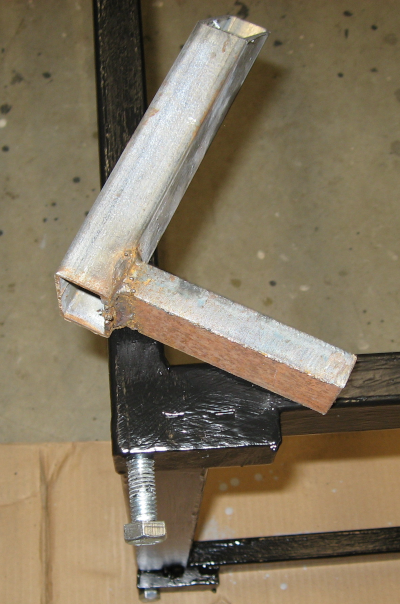
I was initially concerned about welding these feet on. Welding heavy pieces to thin pieces is difficult. Then I realized that all of the force will be downward – the only times the welds will be stressed at all is when moving the bench around. Which will be done once. When the bench is empty.
Welding guidelines are to focus the heat on the heavy part and watch the puddle. I was pleasantly surprised at how well this worked – I was able to get solid welds with very little blowout on the thinner tubing. Maybe my welding is actually improving!
With the frames welded up it was time to paint them. The welding cart was painted at the same time. I was originally going to paint it all black, but decided to paint the file cabinet blue.
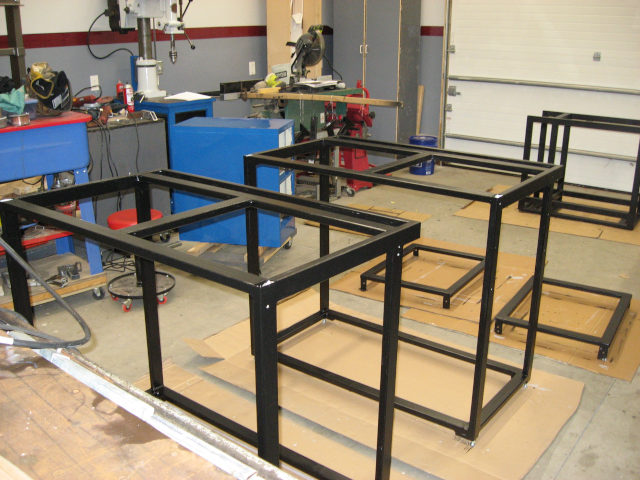
With the frames completed it was time to move them into position and adjust the feet. All that was left was to slide the tool cabinets into place.
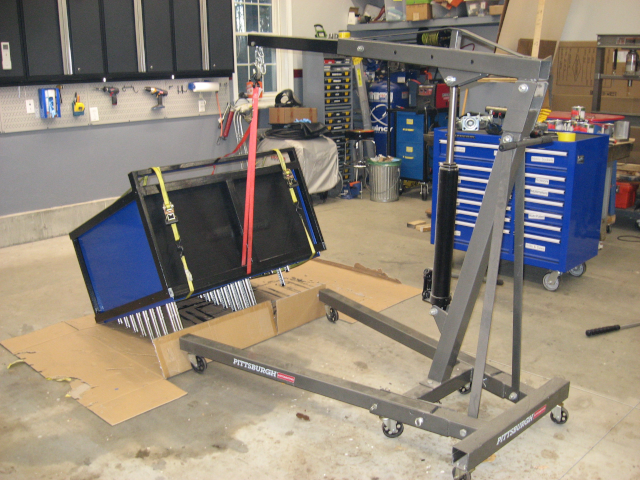
This may have been the most challenging part of the build. The cabinets weigh about 350 lbs. They are loaded with tools, making the actual weight 700-800 lbs. And they are sitting on casters that need to be removed…
First step was to remove all 14 drawers. Then tilt the cabinet over on its face and unbolt the casters. With the tool cabinet still on its face, lay the frame on its face, lift one end of the frame with the engine joist, pick up the other end, and drop the frame over the cabinet. Run some ratchet straps around the frame and cabinet to hold everything together and then tilt frame plus cabinet upright with the engine hoist.
Slide the workbench into place against the wall, check that it is still level, and re-install all 14 drawers. Then repeat the process with the other tool cabinet. With the two sides done the center piece can be bolted into place and the third tool cabinet slid into place.
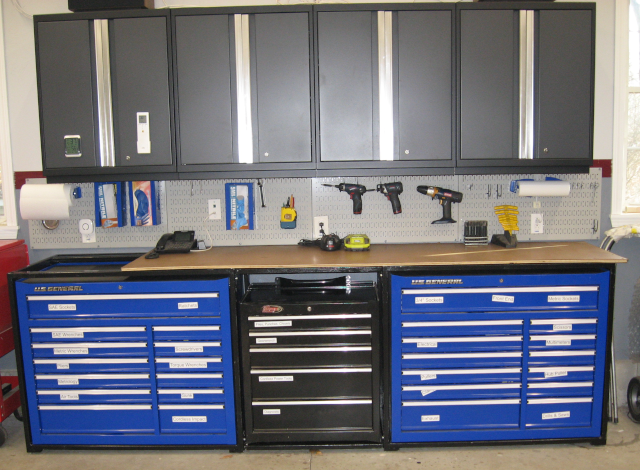
The old workbench top is being used temporarily. I would like to have a 1/4″ steel top, but steel prices are too high. Maybe next year. For the moment I will add another piece of plywood to cover the entire frame and perhaps cover it with a sheet of rubber. At some point I would also like to replace the Sears cabinet with another Harbor Freight cabinet.
The next project is organizing tools and supplies into the new storage. I may have almost enough space for all my crap! Which clearly means that it is time to start acquiring more tools and supplies…
Next: Construction projects continue in Bandsaw Stand.