
After upgrading the power windows on the first two doors in Electrical 13: Relay That Window! it was time to stop stalling and start working on the drivers door. This door has the worst rust on the entire car, so it will be a bit of a project. After removing the glass – including the vent window – the door was pulled off the car and set on the bench. Which revealed the full challenge.
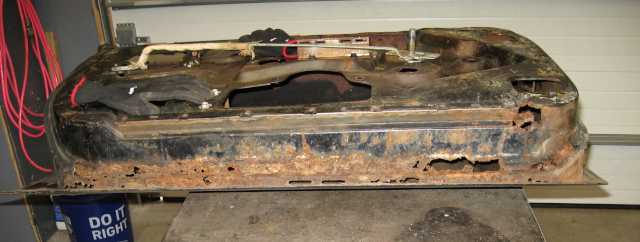
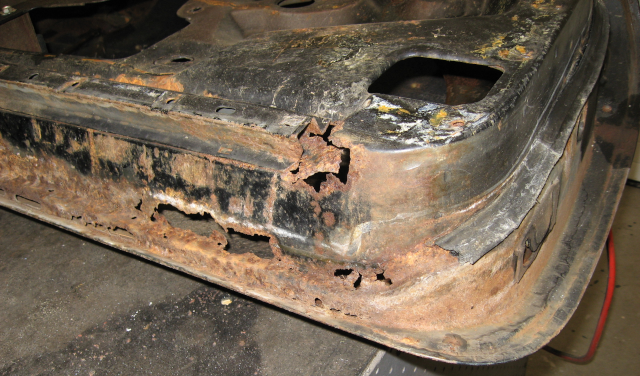
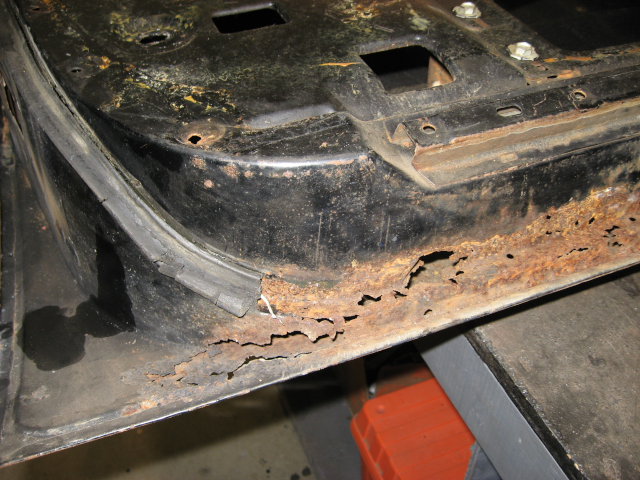
In addition to extensive rust across the bottom of the door, the rust wraps up the sides in areas with complex curves. This is where the door fits to the car and where the weatherstrip is, so the repairs have to precisely match the original shape.
The good news (the eternal optimist said…) is that there is enough metal left to retain the original shape. This makes it possible to replace the rust with solid metal bit by bit and match the original shape. Tedious, but much easier than working from nothing!
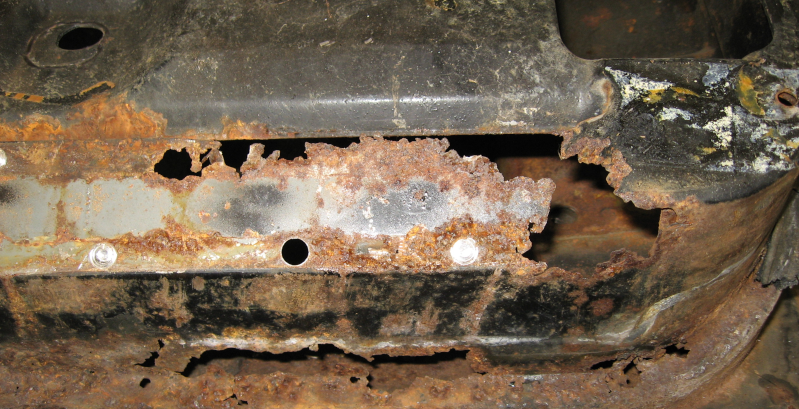
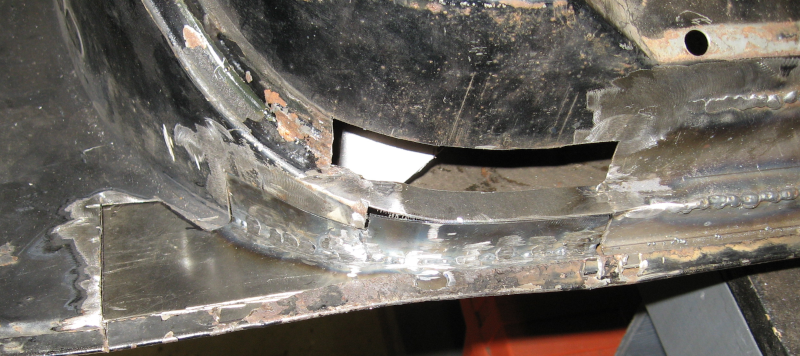
The starting point is the brace going across the bottom of the door. The brace itself is in good shape, but the rust goes well under it. The brace has to come out so that the substructure can be replaced. This involves locating and drilling out the spot welds on the brace.
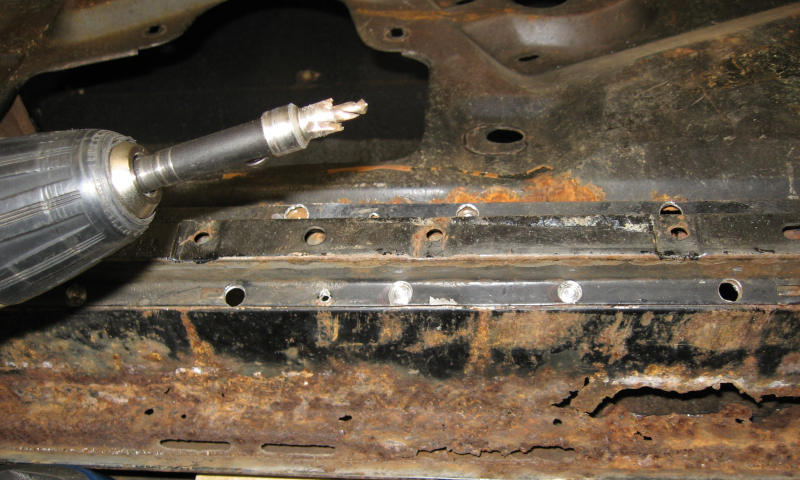
Once the brace is removed the full problem is revealed:
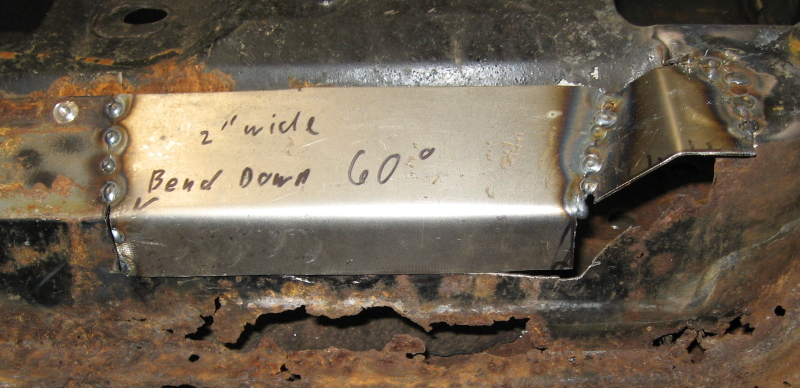
Yeah, that needs some work. Fortunately only straight bends are needed here. Measure the area to cut out, cut and weld in patches, and this part of the door is stabilized for the next steps.
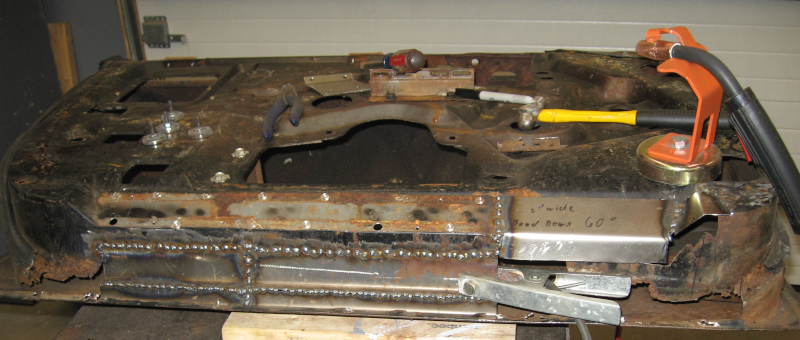
Next work across the bottom of the door, replacing the flat sections first:
The drivers door is the only one with rust in the outer skin, so the door is flipped over. A patch panel is fitted, held in place with magnets, and welded.
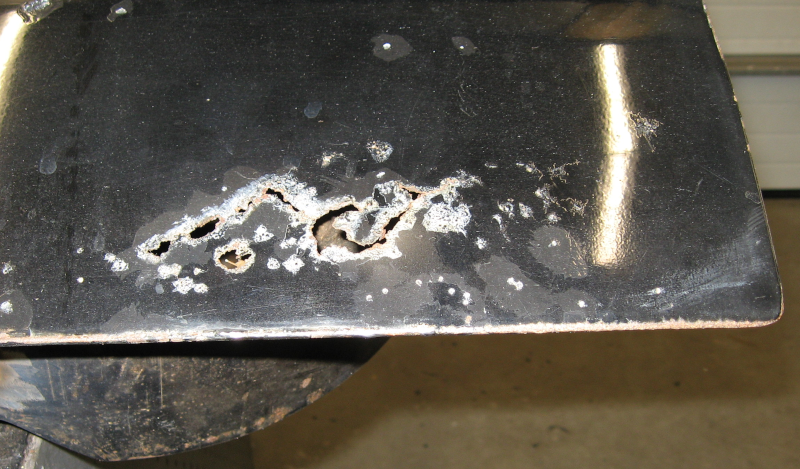
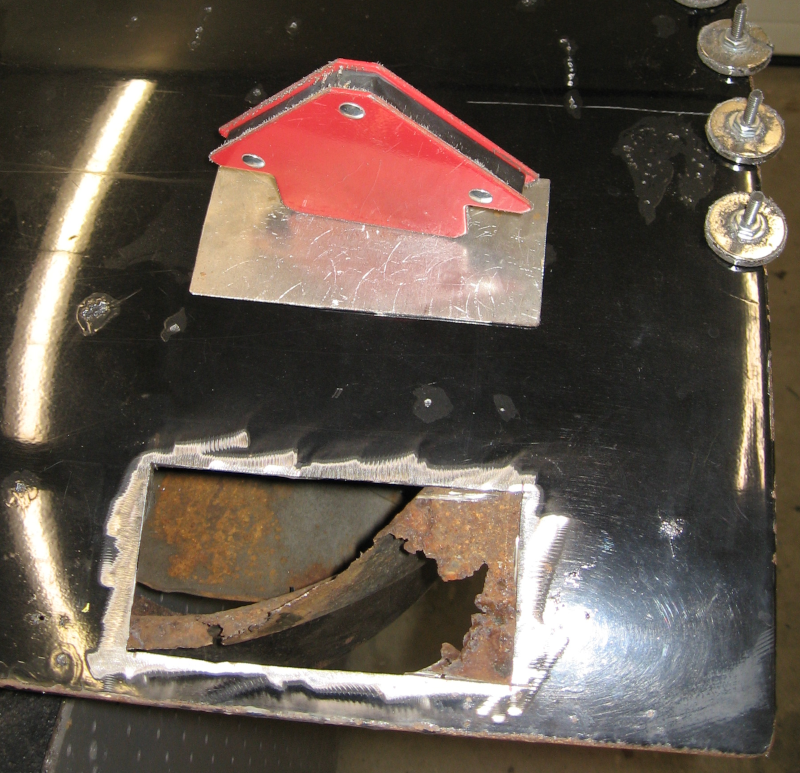

The fit on this patch panel isn’t too bad – maybe I’m getting better! Or, more realistically, less bad…
With the door skin patched, flip the door back over and start working on the curved section. The process remains basically the same – cut and fit small patch panels, cut out the rusted section, tack weld the patch in place, and move to the next patch.
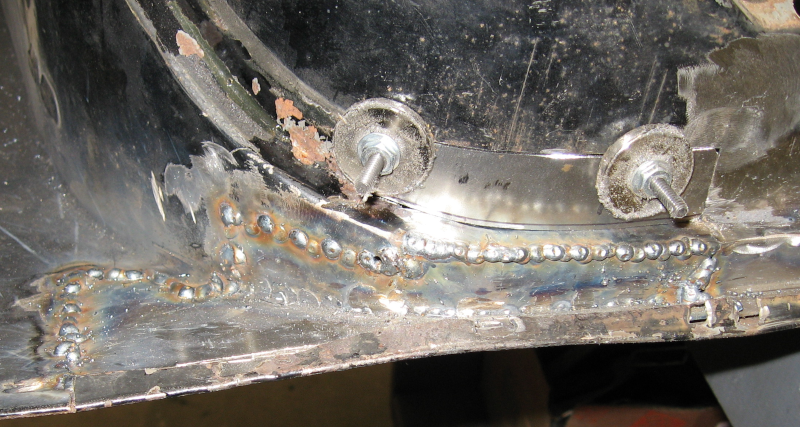
Repeat the process on the front corner of the door and then time to start the process of grinding the welds, identifying gaps, and welding and grinding until everything is solid.
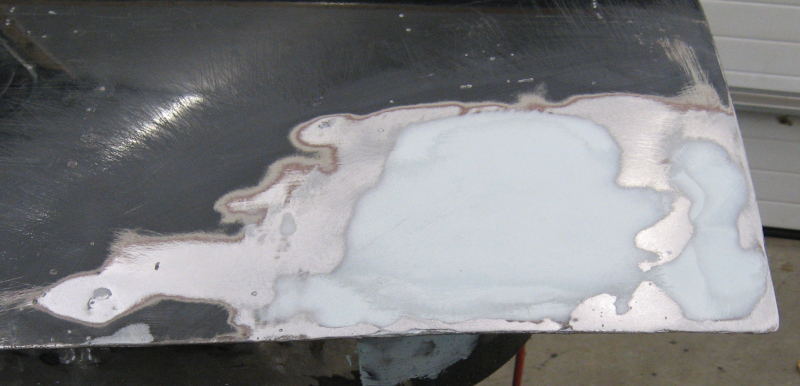
The brace that was removed earlier was welded back on using the original spot weld holes as locators. This completed the structural repairs. While the complex shapes of the inner door structure were rigid enough to hold their shape during welding, the relatively flat outer door skin had just enough warping to be noticeable. The double skin in this area kept me from being able to properly work the metal. A skim coat of bondo and careful shaping with an auto body sanding board made everything perfectly smooth again. This is a very thin skim coat – roughly 1/16″ – 1/8″ maximum thickness.
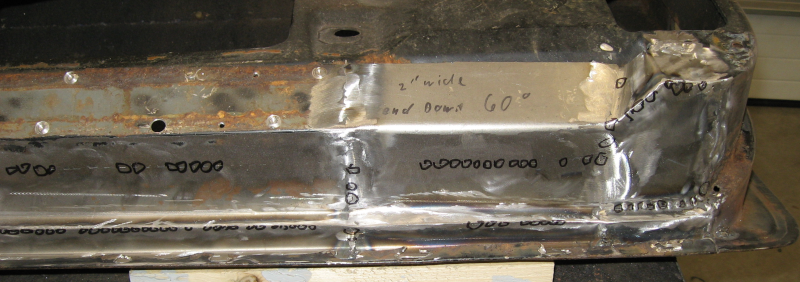
Door seams were filled with seam sealer and a coat of epoxy primer was applied to keep the new metal from rusting:

With the metal work done the door was ready to go back on the car. The big question: Will it fit?
Yes! Yes, it still fits! And there was much rejoicing!
With the first hurdle overcome it was time for the true test: would the door still close with the new weatherstrip installed? The weatherstrip was fitted and held in place with tape. And the door closed! And opened and closed and opened and closed. Success! Sweet, sweet success.
With repairs on the door complete the next step will be to re-install the glass and adjust everything. And apply the power window upgrades to this door.
Next: drying air by AfterCoolin’.