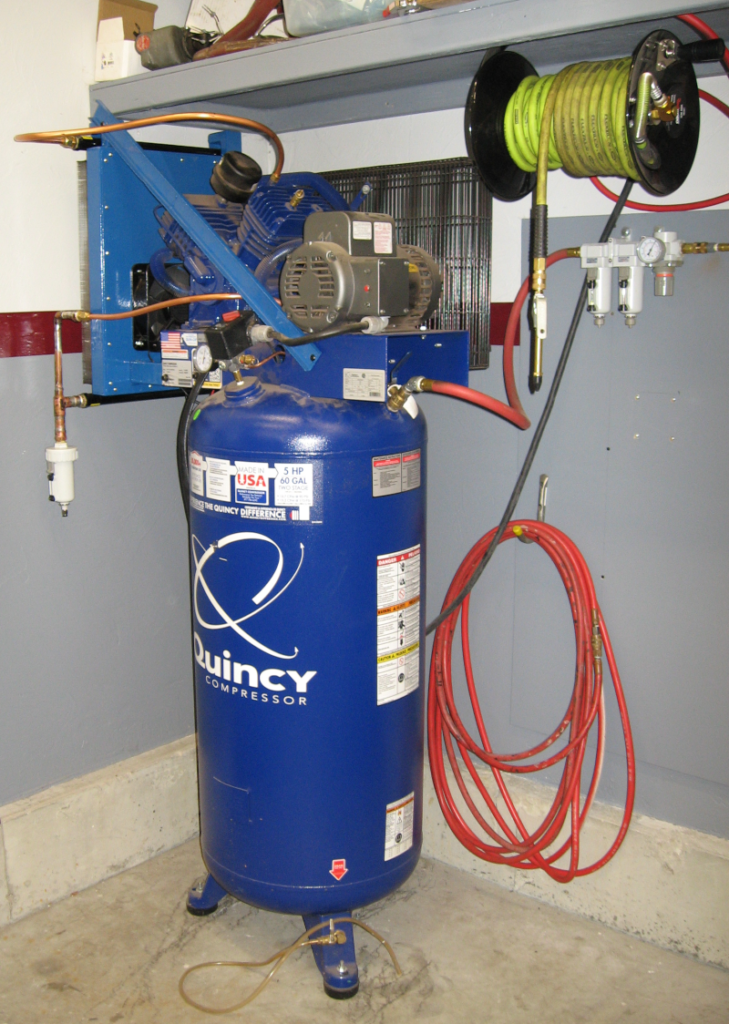
After fighting rust in the previous article Door Three “Delights” I decided to finish off another workshop project to upgrade my air supply.
One of the problems with air compressors is moisture. A basic physics fact is warm air can hold more moisture than cooler air. When there is high humidity this shows up as water in the tank – which has to be regularly drained out – and moisture in the air lines. When compressed air is used it expands. When it expands the air cools. When the air cools any moisture in the in the air condenses into water in the air lines. This water damages air tools, ruins paint jobs, and causes general problems.

Moisture isn’t much of a problem when the humidity is below about 50%. I never thought of New England as being especially humid, but over the last couple of summers I discovered that the humidity is a consistent 70%-80%, with frequent excursions into the 90%+ range.
This caused major problems with painting. I had to use expensive dessicant filters to remove the moisture – and these quickly became saturated and wouldn’t work any more.
One solution is to add an after cooler between the compressor and the air storage tank. This after cooler cools the hot air coming out of the compressor causing most of the moisture to condense out as water where it can be drained away before entering the rest of the system.
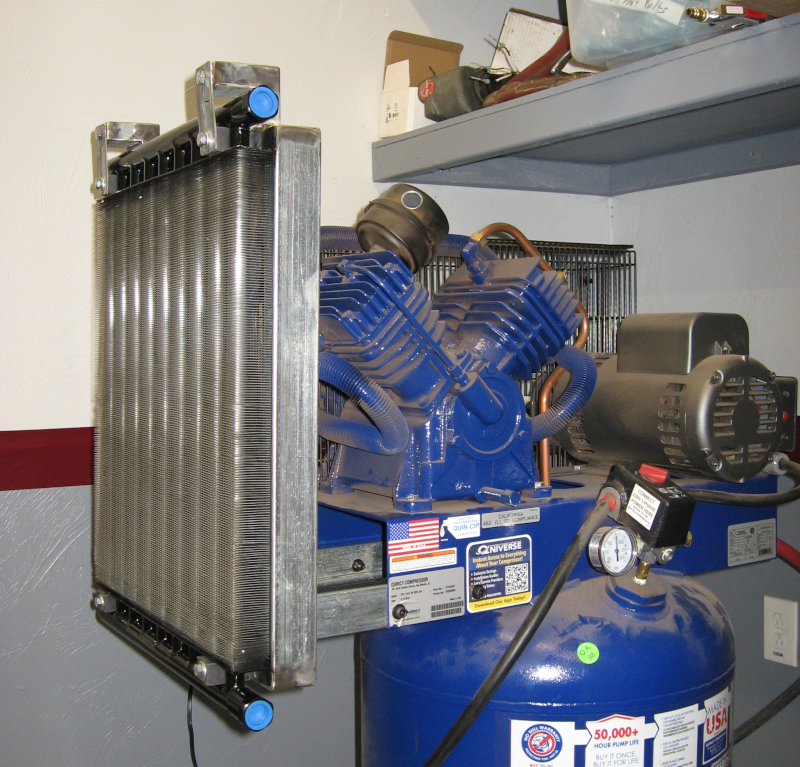
Of course it was Garage Journal that introduced me to after coolers. They are called after coolers because they are installed after the air compressor and before the air storage tank. After reading several threads there I decided to use a Hayden Automotive 1290 Heavy Duty Oil Cooler. This is basically a large high pressure/high temperature radiator
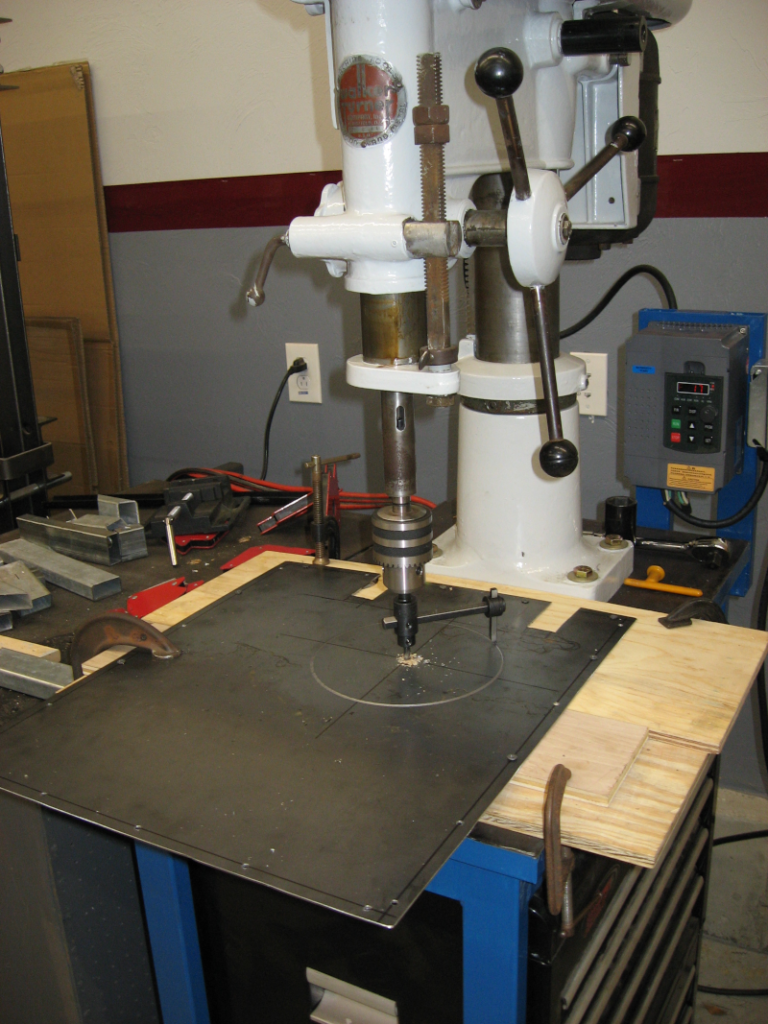
One of the recent fabrication projects involved building a mounting frame out of 1″x2″ steel tubing to hold the Hayden cooler and bolt to the air compressor.

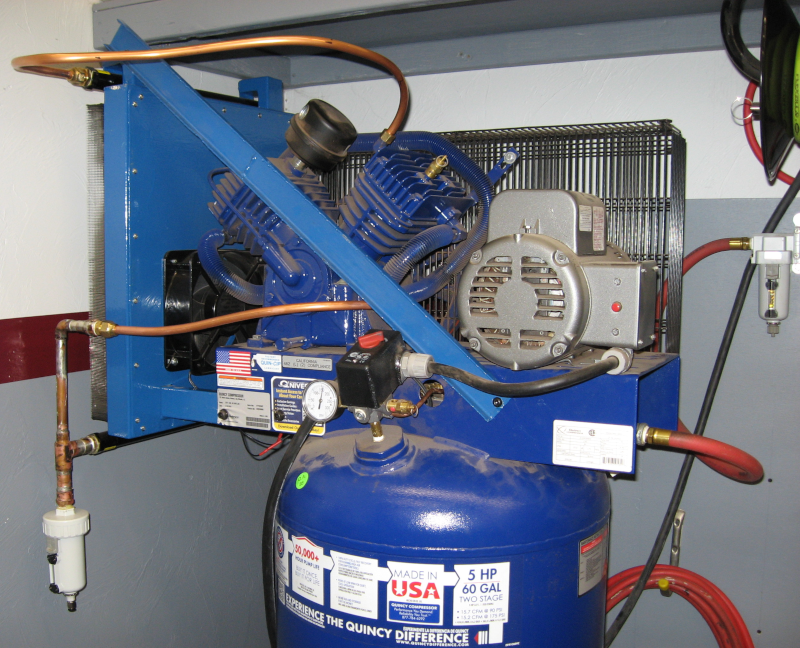
This frame was closed with sheet metal and an 8″ 220V fan added to draw air through the Hayden cooler. Normally an automotive cooling fan would be used, but automotive fans run on 12V DC and the air compressor runs on 220V AC. The fan was connected to the motor output terminals on the pressure switch so that it only runs when the compressor was running.

After test fitting everything the after cooler was disassembled, the frame painted, and then put back together and installed on the compressor. Actually connecting the air lines was delayed a bit by tracking down the plumbing fittings needed.
After acquiring the needed fittings the original copper lines connecting the compressor to the air tank were removed and replaced with new soft copper lines going to the after cooler.
The after cooler includes an automatic drain which will – wait for it – automatically drain the water that condenses in the after cooler and prevent it from reaching the tank.
With the final plumbing installed and all fittings tightened it was time to fire up the compressor and see if it worked.

The compressor started to run – always a good sign! – and pressure began to build – another good sign. The pressure built to the full 165 psi and turned off. Nothing blew out, yet another good sign. The new fittings were checked for leaks with soapy water and no leaks were found.
And there was much rejoicing!
Did it work? The basic test is output temperature from the compressor and input temperature to the pressure tank after the after cooler. Air gets hotter when it is compressed and can reach up to 350 degrees F coming out of the compressor. I monitored the output of the compressor which reached a maximum temperature of 315 degrees. The maximum temperature going into the tank was just over 90 degrees – a reduction of over 200 degrees! But still at least 30 degrees over ambient temperature.
The initial test was done without the cooling fan working – I wanted to make sure all of the plumbing was solid before making the electrical connections. After hooking up the cooling fan I cycled the compressor again. Initial temperature going into the tank was 59 degrees. Maximum temperature observed while the compressor was running was 62 degrees – a really excellent result!
The air was extremely dry today – humidity was only 16% – so no water was collected in the automatic drain valve. I expect the drain valve to get a workout as soon as the humidity goes back up to 90%+.
Update (August 2, 2022): The air compressor has been getting an extensive workout. I just dumped out close to a gallon of water from the automatic drain. There was virtually no water in the tank and just a trace of water in the original water filter. On humid days I’m no longer getting a fine mist of water from the air tools like I was before. The aftercooler is a success and a very worthwhile project!
Next: time to quit stalling and tackle the last door in Door Four Debacle.
