
After finishing the last door in Door Four Debacle it was time to move on to the next rust damage I had been avoiding – a hole in a rib in the hood inner frame.
Wrestling the hood off of the car is normally a two person job, but only one of me was available. No problem! Drag out the engine hoist, hook it up to take most of the weight, and I can handle the rest. Demonstrating the wisdom that comes with age (or perhaps expensive and/or painful mistakes…) I quickly realized that you have to have people on both sides of the hood to control it while it is flying through the air. Desperate times call for desperate measures, so I asked She Who Must Be Obeyed for help. With two people guiding the hood it safely migrated off the car and onto the workbench.
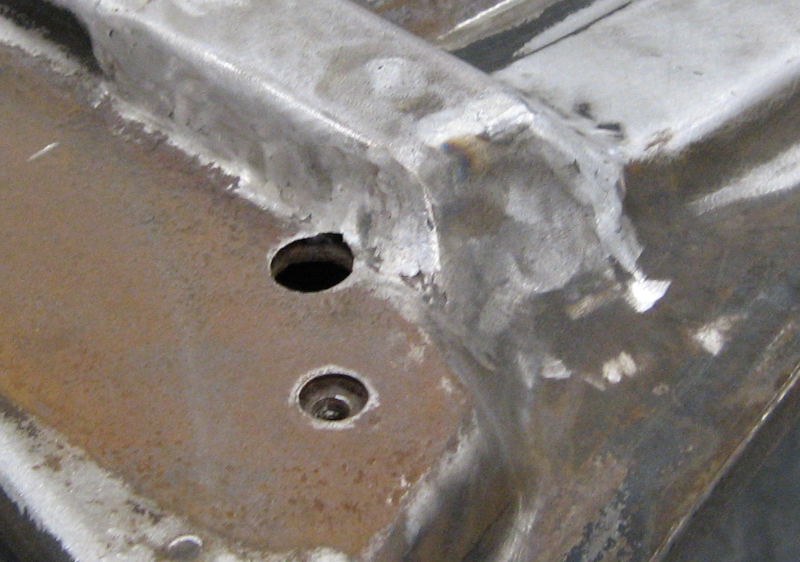
Unfortunately I didn’t get a before picture, but the hole was at the end of one of the pressed ribs in the hood frame, next to the hood hinge. This is a complex area: multiple curves at different angles and all edges have a large radius. A single face of the damaged area is joined to up to six other faces, and all of them have to match exactly. There is a reason I’ve been stalling on this job!

My initial plan was to make a single patch panel to replace the entire area I had to cut out. This is elegant but very difficult to do… One of the key lessons learned on other patches is that you can create a single large, complex part out of multiple smaller and simpler parts. Further, you can start with one small part, weld it into place, and then fit the next part to it – bend, fit, mark, trim, precision sand the edge to fit, and then weld this new small piece into place. Continue like this across the entire part and you can build complex shapes that are quite precise.
One of the advantages of working with metal is that you can add (weld) and subtract (cut, grind, or sand) material freely until you are happy with the result. With patience and a willingness to re-do work you can achieve surprising results. After grinding welds smooth it is difficult to tell where repairs have been made. A bit of body filler, some high build primer, and a coat of paint and the result looks perfect! For certain values of perfect…
In previous repairs I was able to bend the patches by either using my (small) bending brake or simply over the edge of my steel fabrication table. This produced a small radius curve at the bend, but I was able to fit the patches to the surrounding structure. This approach just wouldn’t work on the hood.
I needed something to match the radius of the curves. After mulling this over for a while I realized that I had an assortment of bolts of various sizes. OK, this could work.
With this approach in mind I cut out the damaged area and started to work. The first question was what is the radius of the existing edges? I grabbed a handful of bolts, cut out small test pieces of sheet metal, and bent the test pieces around the bolt. Holding the bolt and sheet metal panel for bending was an issue. The brute force approach was to simply clamp the bolt and metal part in a vise. This would be much easier with three hands… Doing it this way is slow, but acceptable for the small number of pieces needed for this repair.
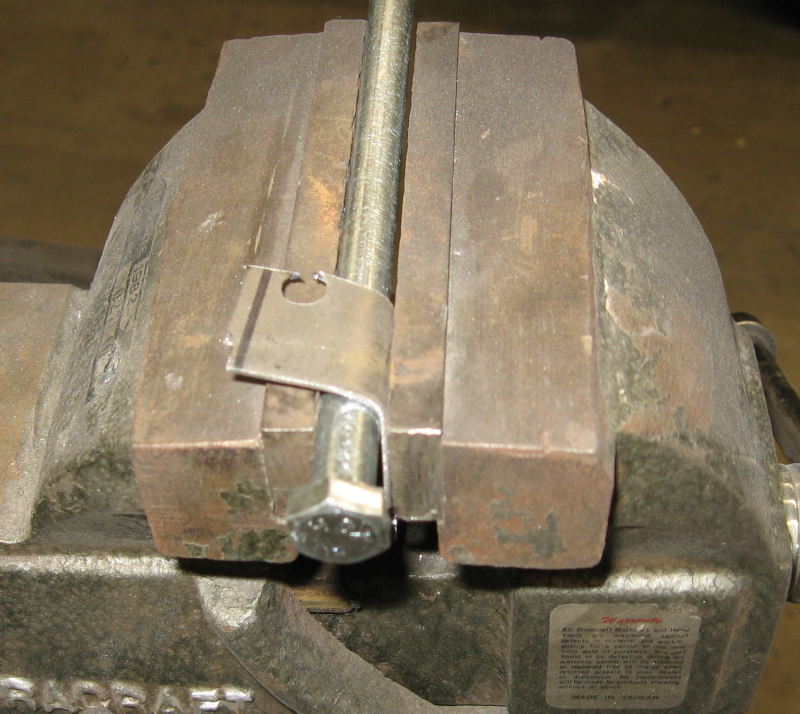
A 1/2″ bolt produced a curve the nicely matched the existing hood frame. The rest of the bolts were returned to their storage boxes to make sure I didn’t get confused when making parts. Of course I haven’t actually done anything like that in the past!
With the problem of bending the edges to shape solved the job became relatively straightforward: Pick an edge to start with. Cut, bend, and fit a piece of metal to that edge, perhaps starting with a cardboard template. Once happy with the fitment, weld the new part into place.
Then choose the next edge to work on. Cut, bend, and fit another piece of metal to match this new edge and to the part previously installed.When happy with the fit, weld the new part into place. Repeat this process until you once again have a complete frame section with no holes.
The corners where the parts meet were basically spherical and presented special challenges. The new pieces being welded in were left somewhat long. After welding them in the corner was worked with a body hammer until it had the desired spherical shape. Cutting notches in the corner and careful hammer work produced acceptable corners. With more practice I should be able to do even better. Once the corners were worked into shape they were welded up – both the edges and the notches that can been cut into them. The corner was further shaped with careful grinding, resulting in a smooth and convincing result.
Compare this with the other side of the hood frame which received no repairs:
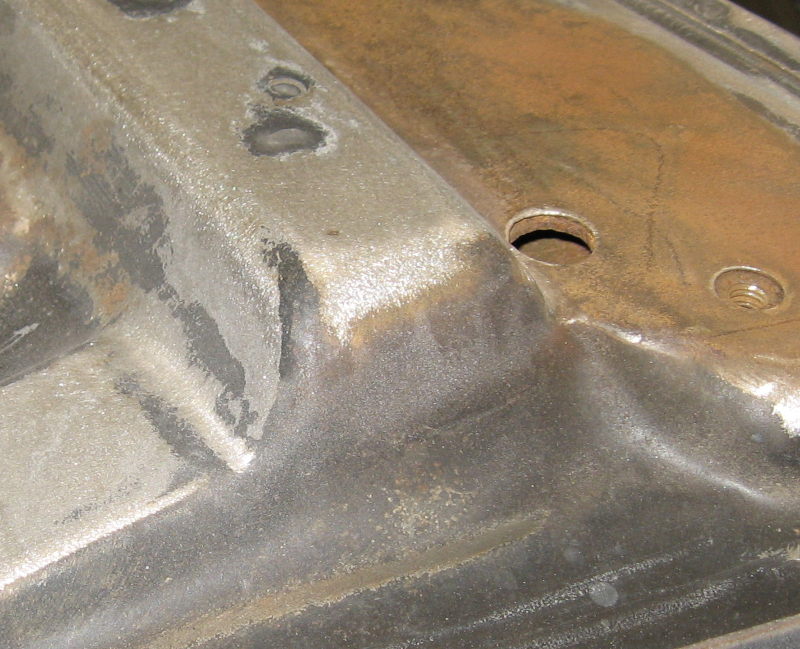
Not a perfect match but solid and much better than a rust hole.
With the rust repairs done I took advantage of the opportunity to strip the paint off the bottom of the hood. This was partially done as a dry run for working on the rest of the car. Stripping the paint with an orbital sander works but is tedious and slow. Not ideal for the 63 acres of paint on the rest of this car…
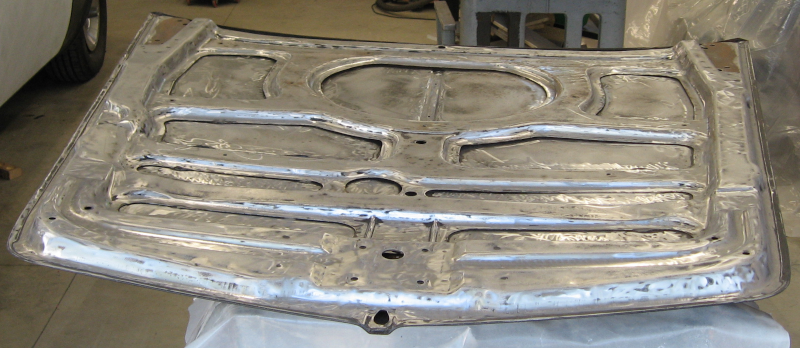
After removing the old paint the hood received two coats of epoxy primer and two coats of finish paint.
While the end result looks good, I should have taken a bit more time and applied body filler to the patched area before painting. If you look closely you can see some divots and scratches from the grinder that have telegraphed through the paint – exactly the sort of thing that body filler and primer/filler hide. I need to remind myself that this is on the bottom of the hood and that no one else will ever notice or care…
Next: preparing the side of the hood that shows in Hoodie 2.