
In the last article, Hoodie 2, we finished working on the hood. Which meant it was time to move on to the rest of the car.
Paint serves many functions. It is the most visible part of a car, driving your perception of the car. It is a protector, keeping the underlying metal from rusting. And it is an opaque barrier, hiding whatever is beneath – whether it is solid metal or Bondo… This last part is critical with old cars.
I’ve already covered several discoveries hidden by paint and trim. And strongly suspect that there are more hidden surprises lurking under that sinister black paint. There are several bad areas in the paint – it looks like something was left on the hood which ate into the paint:
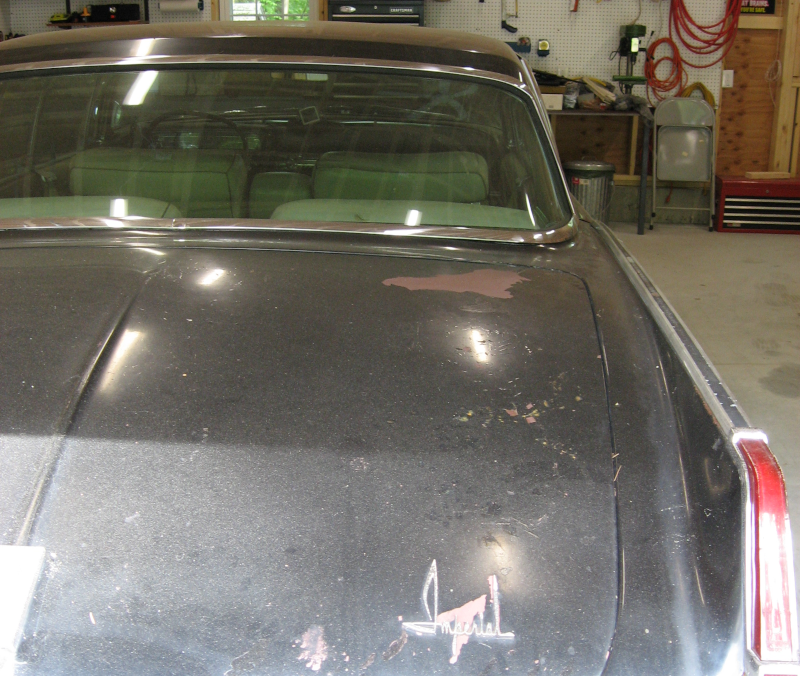
Several spots on the trunk lid are down to primer:
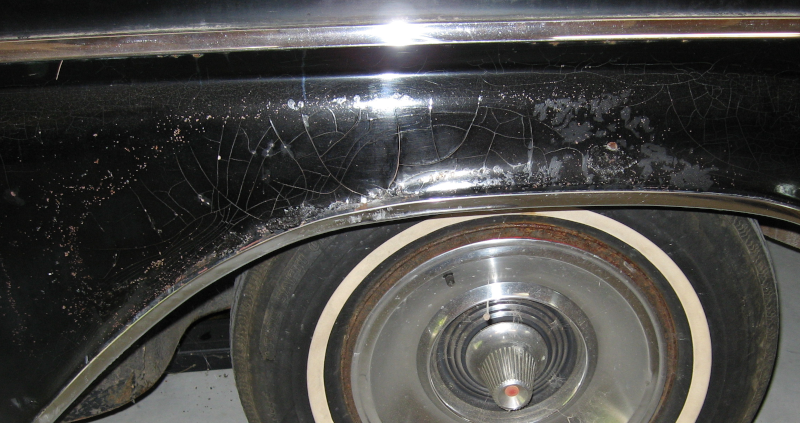
There are areas where the paint is badly cracked:
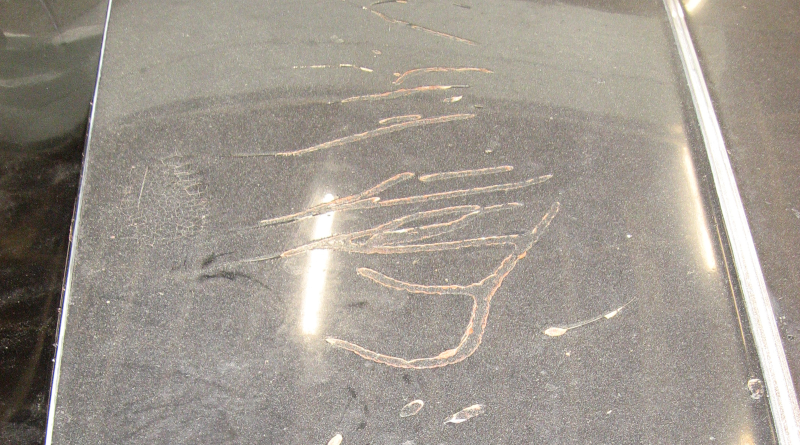
And most interesting are the numerous speckles on both sides of the car – with the exception of the front passenger door, which we know was previously repaired. These speckles go completely through the paint, there is grey metal at the bottom of the holes that looks like lead, and the holes haven’t rusted. My theory is that the car was shot with a shotgun – repeatedly. I would really like to know more about the history of this car!

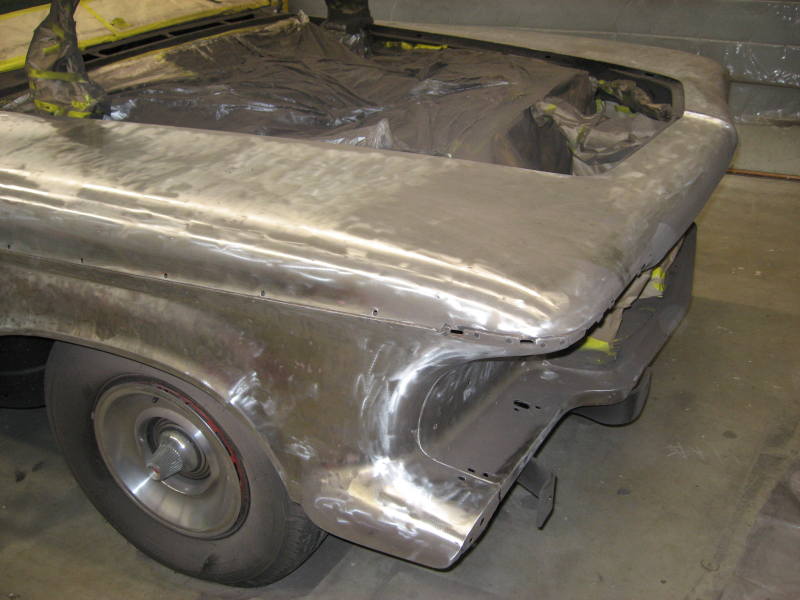
Between the known issues and the unknown issues the only way to prepare the Imperial for paint is to completely strip the entire car down to bare steel, repair as needed, and build up a foundation for new paint. I have to become a stripper – a paint stripper!
But how?
An orbital sander is much, much too slow. A flap disk takes paint off quickly but damages the metal. Chemical paint strippers are incredibly messy and don’t work well – EPA regulations have made paint stripper less toxic and less effective than it used to be. What is left?
Research turned up something called strip disks. These are basically a sponge like material with abrasives embedded in the plastic and are designed to go on an angle grinder. The theory is that they are abrasive enough to remove paint, the open mesh keeps the abrasive from getting clogged with paint (an issue when using sandpaper), and they don’t damage the underlying steel.
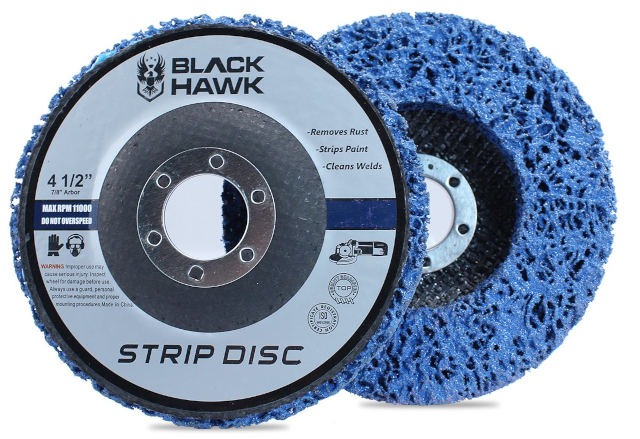
Worth a try, so a box of BHA Easy Strip Discs was ordered. Many choices are available; this one was chosen based on a combination of good reviews and a mid-range price. My theory is that the cheapest choice is cheap for a reason, the expensive choices may be either good or simply over priced, and that medium price ranges are often the best balance of quality and cost.
With a strip disk mounted on the angle grinder, an N95 face mask strapped firmly in place, and safety goggles perched on my nose I cautiously approached the Imperial, ramped the grinder up to 11,000 rpm and applied it to a test area.
The strip disk worked great! It quickly and completely removed the paint and left the underlying metal undamaged. In fact you could still see the various imperfections in the surface of the steel. This will work!
Well, “quickly” is relative. We are talking about removing paint at the rate of square inches per minute. A single door takes about half a day, and a fender takes half a day to a day. Reaching the center of the roof and trunk lid is a major stretch – and the grinder gets heavy very quickly when waving it around at full extension of your arms. Bracing yourself in position so that you can stretch that far uses leg muscles that aren’t used for any other purpose – as they remind you for the next three days… Stripping paint off of a large care is literally a pain!
The bad news is that it took over a week of incredibly dirty days and two boxes of strip disks to complete this miserable task. I ended each day looking like a racoon once I took off the face mask and safety goggles. I left my clothes in the basement to avoid tracking dirt through the house and had to run them through the washing machine twice to completely remove the paint dust from both the clothes and the washer. The water going down the shower drain looked like something out of an Alfred Hitchcock movie – in black and white, of course!
The good news is that the paint was completely removed, giving me a solid foundation for a good paint job.
The results?
The strip disk turns the paint into paint dust creating a massive mess. How massive? As previously mentioned this car has about 64 acres of surface area. It requires about a gallon of primer and 1-1/2 gallons of paint to cover it, or about 2-1/2 gallons total. Automotive paint is roughly 80% solvent and 20% solids. This means that there is about 1/2 gallon of solid paint on the car which is turned into dust. Plus any Bondo that was hidden under the paint – and Bondo is applied much thicker than paint. Of course dust takes up more space than the equivalent solid, so we are looking at creating 1-2 gallons of paint dust – which is blown off the car at high speed by the angle grinder. This dust ends up EVERYWHERE! On the car, on the floor, in the back yard where it has been sucked out by the vent fan, on the protective curtains, on the shop tools, and everywhere in the shop.
Not to mention in the shop vac. The trusty shop vac was used almost continuously to try to manage the paint dust. The car and floor were vacuumed repeatedly. I emptied the shop vac and cleaned the shop vac filter at least 4-5 times during this project.
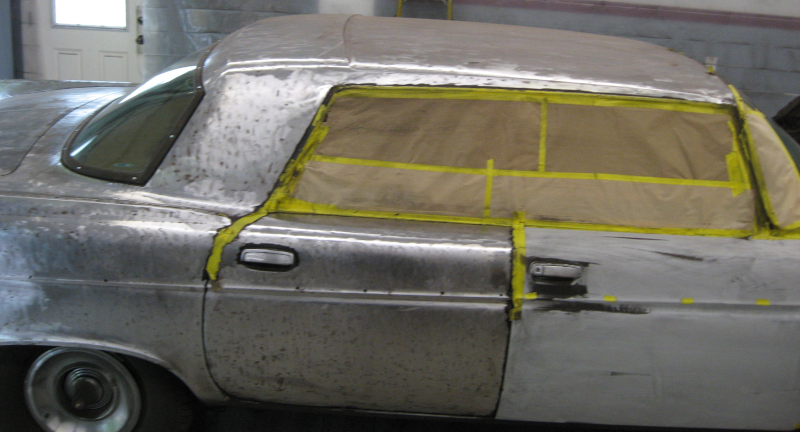
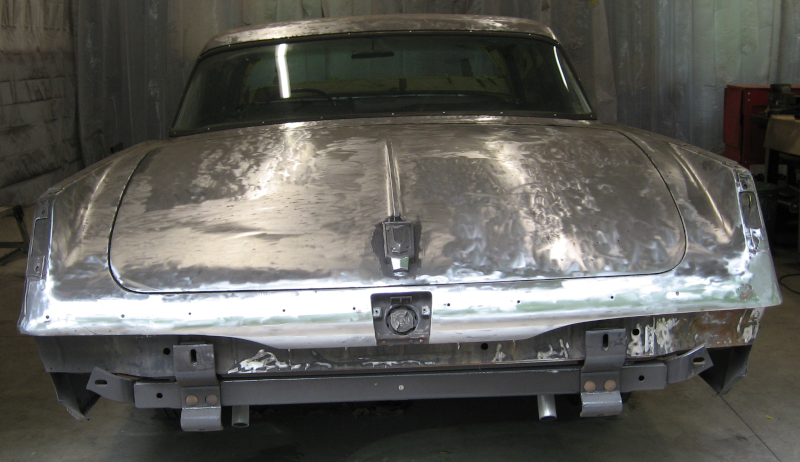
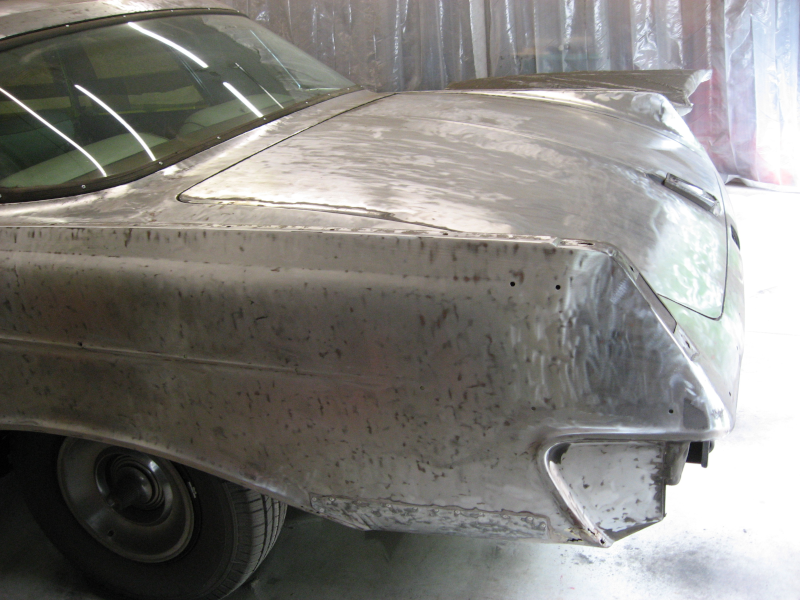
With all of the paint removed from the Imperial and the car, floor, table, shop equipment and other miscellaneous surfaces vacuumed it was possible to take stock of the actual condition of the body.
Uh Oh – what is that at the bottom of the quarter panel previously hidden under a layer of bondo?
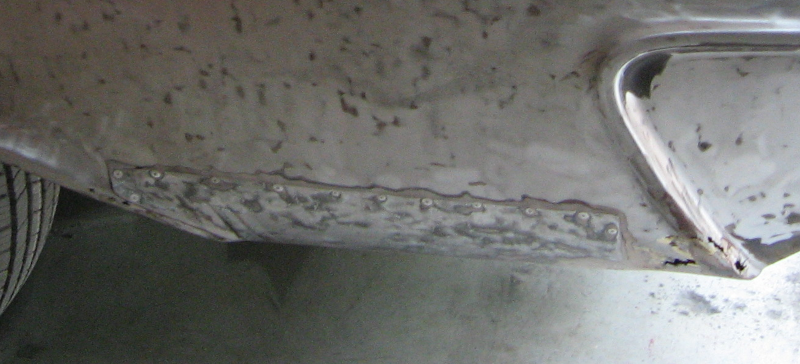
Surprise! One of the worst ways to “repair” rust – just pop rivet a piece of sheet metal over the top of the rusted area, cover with Bondo, and paint to match. Plus other rust holes that had just been Bondo’d over.
Actually, this was almost good news. I had seen evidence of this patch panel on the bottom of the quarter panel and was afraid it covered a much larger area. Stripping off the paint showed more rusted areas on the other quarter panel, although without the nasty patch.
This whole area will be cut out and new patches welded in place. Only a skim coat of body filler will be needed, unlike the 1/4″+ applied over the riveted patch. It will take time to patch these areas properly – but it will be done properly this time!
Other details were also revealed. Several small dents turned up that need to be fixed as well as a couple of larger dents. The shotgun blasts will need work. I’m not nearly as close to being ready for paint as I had hoped to be.
But, overall, the car is solid and in good shape. There were fewer surprises than I really expected. The rusted areas hidden under the paint are in areas that are almost guaranteed to rust on older cars. There is surprisingly little rust in the front fenders and the rocker panels are solid. Even though I’m complaining about what was hiding under the paint, I really can’t complain.
Just to add to the entertainment, I won’t be able to work on the car for several weeks. It can’t be left as bare steel as it will start to rust again. Since there is paint dust everywhere I had to vacuum everything, remove all of the old masking, vacuum again, wash twice with solvent, mask everything again, wash with solvent, go over it with a tack rag, and spray a coat of primer. Which I did.
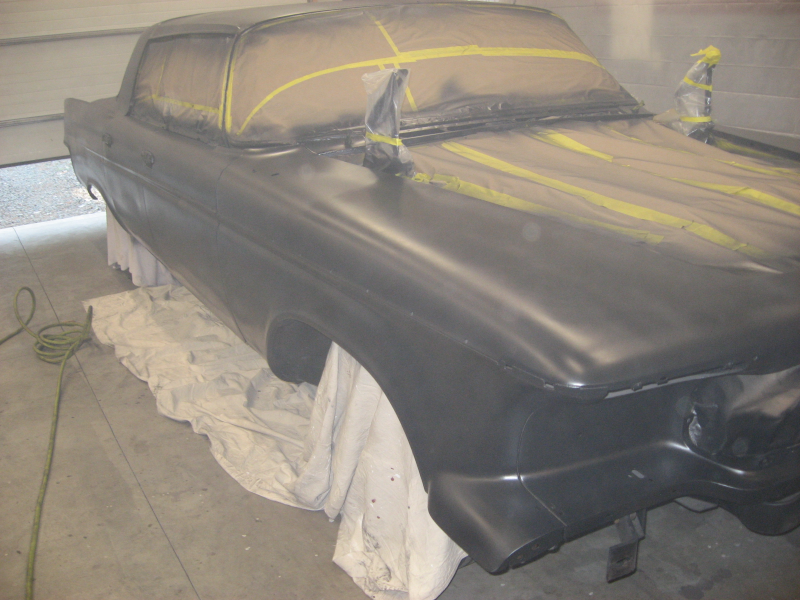
The epoxy primer leaves a flat back finish that is popular today, especially on hot rods. It looks positively evil on this car, and I mean that in a good way. I’m tempted to black out the chrome trim, put it back together, and drive it like this! I’m not going to, but it is tempting…
When I get back to work on the car the plan of attack is rust repair followed by dent repair. I have to figure out how to deal with the shotgun blasts – hopefully high build primer will take care of this. The whole car will be sprayed with high build primer and the surface perfected. Once the surface is perfect a final coat of epoxy primer will be applied and then the car will be ready for the paint shop.
Next: Wrangling Rust