
Previous Electrical: Electrical 13: Relay That Window!
Let’s take a break from Wrangling Rust and look at the dashboard.
A common problem with older cars is inaccurate gauges. Perhaps the worst offender is the gas gauge, with many (most?) 1960’s Mopars having dead or wildly wrong gas gauges.
The fuel sender is a float in the gas tank that moves an electrical wiper over a wire wound resistor. In addition to mechanical wear, the fuel tank is a corrosive environment. When you can find a replacement fuel sender it often doesn’t work well with the gas gauge.
I had this problem with the Imperial. The gas gauge never read over 1/2 full, even with a freshly filled tank. When I removed the old sender it was so corroded it literally fell apart in my hands. Like many other parts for these old Imperials a replacement sender was hard to find.
Of course the new fuel sender didn’t work well with the gas gauge.
I was able to bend the float lever on the new sender to get it to read full when the tank is full. However, the gas gauge reads empty when the tank is still 1/4 full. This is much better than reading 1/4 when the tank is actually empty, so I have been living with it.
A recent email from the Online Imperial Club mentioned MeterMatch. This is a small electronic box that fits between the sender and the gauge in the dashboard and allows you to match the sender to the gauge.
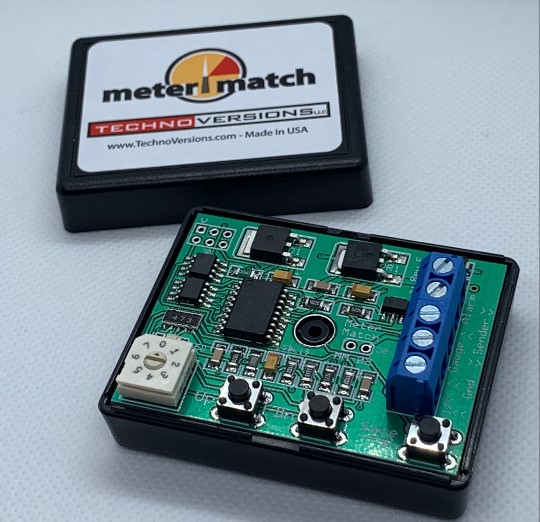
From their web site: “To calibrate MeterMatch, you first set the sender to a known value. For example, fill your fuel tank. Set the MeterMatch to program mode, then with the up and down buttons, make your gauge read what you want for that sender value. When you are satisfied with the reading, press the “save” button, and the value is remembered in the MeterMatch. Do the same process with the sender reading a value near the other end of its range, and you are done. MeterMatch interpolates from these values to make the gauge read proportionately at values above, below, and between the calibration values. It also has cardinal-point values stored inside that you can use if you know the resistance of your sender.”
If you are installing a new fuel sender you would temporarily connect it to the fuel gauge before installing it in the gas tank. Raise the float to its highest position and adjust the MeterMatch so that the gas gauge reads full, then lower the float to its lowest position and set the gas gauge to empty.
You can also set intermediate calibration points to make 1/4, 1/2, and 3/4 on the gas gauge completely accurate.
I haven’t used MeterMatch yet but it is a very interesting device I will probably add in the future. I’m mentioning it here in case anyone else needs it. And to be completely frank, so I can find the link in two years when I can’t remember it…
Next: finishing preparation for paint in Block Party Blues.
Next Electrical: Electrical 15: Factory Wiring Diagrams