
Previous electrical: Electrical 15: Factory Wiring Diagrams.
With the beautifully chromed headlight buckets ready to install it is time to complete the job of upgrading headlight wiring. You may recall from a previous post that I left the original factory wiring in the headlights themselves, waiting for the chrome plating to be done.

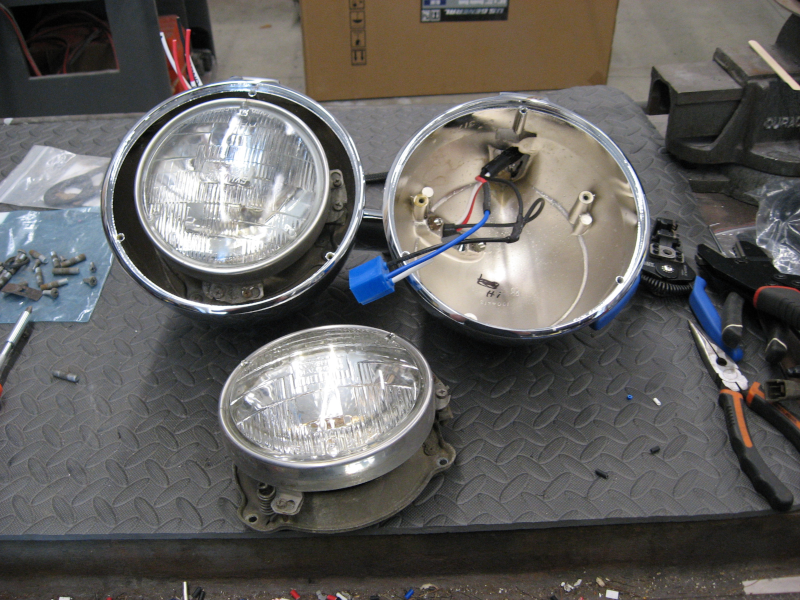
This picture shows the freshly chromed headlight buckets, the crossmember that connects the two buckets on each side, the mounting hardware for the headlights that goes inside the buckets, and the original factory wiring. The wiring goes up the base of the inner bucket and then through the crossmember to the outer bucket.
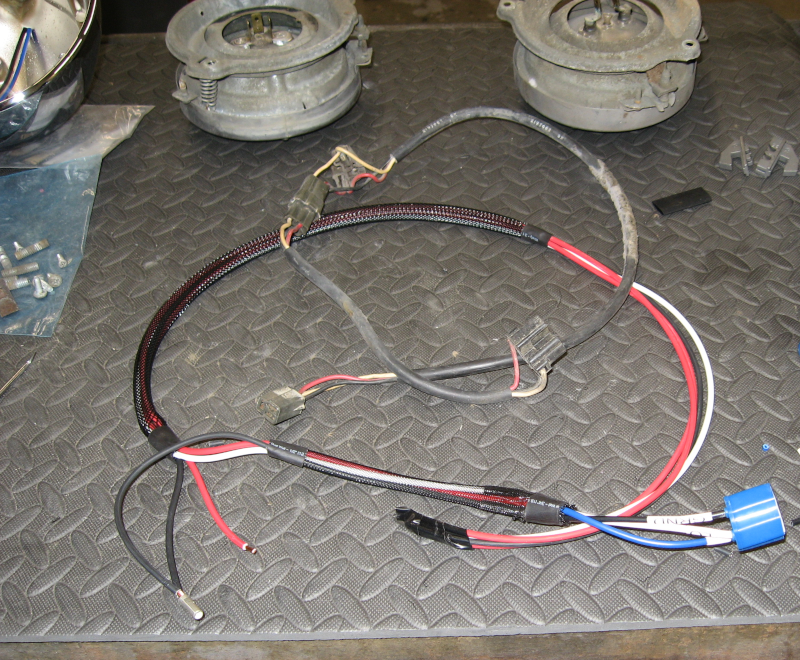
The original harness had two inline connectors. It also had a single 16ga wire for the low beam, a single 16ga wire for both hi beams, and a single 16ga ground wire. Between long runs of thin wire, multiple connectors, and 60 years of corrosion there was noticeable voltage drop to the headlights.
The new harness has a single connector, which is now a waterproof WeatherPack connector. It has a dedicated 12ga wire for the lo beam, two 12ga wires for the two hi beam headlights, and a 12ga ground wire which directly connects to the battery. As a reminder, power for the headlights now comes directly from the battery going through relays. Wire length has been reduced from 8′-12′ for the factory wiring to about 3′ with the new wiring, further reducing voltage drop.
All connections are sealed with marine heatshrink tubing with glue. Wire harness braid is used for both appearance and protection from chafing. Also note that the wires are labeled – this continues to save me from mistakes!
The actual socket that the headlight bulb plugs into is now a high temperature ceramic socket. The factory headlights were 35 watt while new headlights are 55, 65, or even 100 watts. With new bulbs the headlight buckets might trap enough heat to melt normal plastic sockets. While I probably won’t run 100 watt bulbs I do plan to upgrade to 65 watt bulbs.
Since I knew exactly how to build the new headlight harness I only had to rework it four times. And the second harness went even faster!
With the headlight buckets attached to each other through the crossmember the headlight mounting hardware is installed in each bucket. The headlight bulbs are plugged into the new ceramic sockets, positioned in the mounting hardware, and secured with the retainer ring.
Chrome trim rings (not shown) are installed on the front of each headlight bucket and the headlights are finally ready to mount on the car! This was a simple job, so this 15 minute task only took me two hours.
The only thing left to do was illuminate the workshop with now high powered headlights! Which I proceeded to do with lo beam and no high beam. Krud.
I quickly determined that I had swapped the lo beam and ground wires on the connector. Fortunately I was able to remove these two pins (thanks to having the foresight to buy a WeatherPack de-pinning tool…) and move them to the correct locations. NOW I had bright lo beams and hi beams! The second pair of headlights worked the first time.
For now I’m still using the original sealed beam halogen headlight bulbs. These will be upgraded to modern H1/H4 bulbs when finances allow. Or when I start driving at night, whichever comes first.