
It has been way too long since the last update. I have a weak excuse for this – I haven’t actually done anything to the Imperial… The summer has been consumed with other projects:
The first major project was finishing off the three season room we started last fall. We ran out of time last fall to install the Trex decking, so as soon as we had decent weather it was time to strip off the 35 year old pressure treated deck boards and replace them with Trex. Specifically, a 12′ x 21′ deck, a 6′ x 8′ landing, and two stairs. Fairly straightforward, but time consuming.
Once the decking had been replaced new railings were needed. I made the mistake of letting She Who Must Be Obeyed find my stash of Fine Homebuilding magazine. She liked cable railing. OK, check the companies that make them, punch some information into their online estimator, and choke on the price.
While contemplating the situation it hit me – I have a welder and I’m not afraid to use it! Time to research how cable railings are made, design a complete railing system, and retreat into my fabrication shop.
Following my usual approach of overkill, the railing was designed with steel tubing – 11 gauge 2″ x 4″ top rail, 11 gauge 2″ x 2″ uprights, 11 gauge 1″ x 2″ bottom rail, and laser cut 3/16″ thick 6″ x 6″ mounting plates. This is probably three times as heavy as a commercial railing system. Since steel tubing comes in 24′ lengths I was able to build the entire 21′ long main rail as a single piece – the commercial railing systems would require three pieces for this. Time to cut, weld, and assemble the main railing, including turning some custom fittings on the lathe to allow the railings to be bolted together with hidden bolts. This was followed by the traditional three coats of paint.
The 3/16″ stainless steel cable for the horizontal rails was actually fairly easy to install once I got the proper fittings and a hydraulic crimper.
The main railing was ready to install. All 200 pounds of it. Six feet up in the air. And it had to be held in exact position with precision alignment while it was bolted to the deck frame. By two people who are past the point of heavy lifting. Yeah. No.
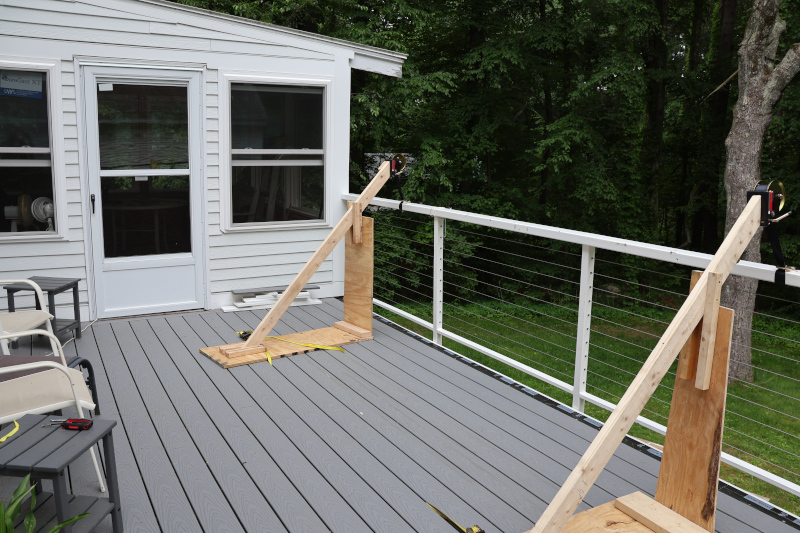
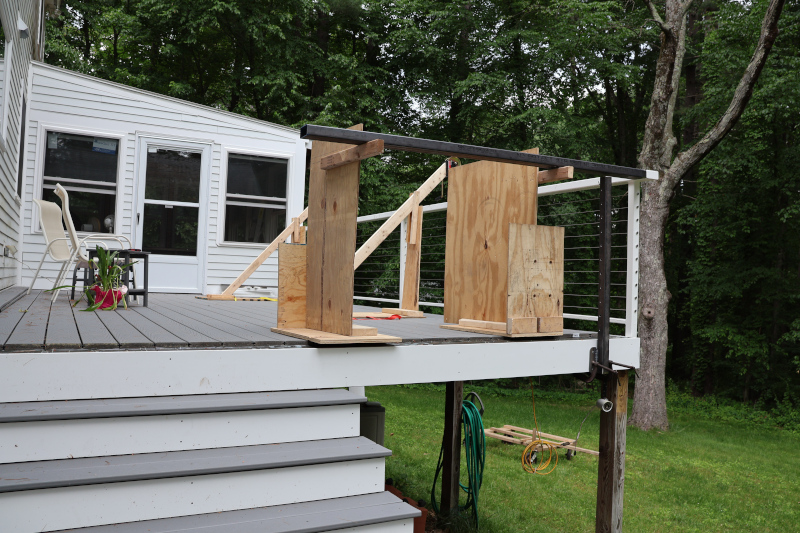
While brainstorming alternatives an inspiration suddenly hit with an audible thud: For lifting, get a couple of cheap boat winches from Harbor Freight and make derricks out of scrap lumber. For precise positioning make a couple of supports out of scrap lumber at exactly the height of the railing. And to move the railing from the workshop to the deck use the wheeled cart normally used to store kayaks.
With the main railing in place the second section was mocked up, fitted together, and tack welded.
Once this second section of railing was completed, painted, and installed that last step was to fabricate and install left and right stair railings:
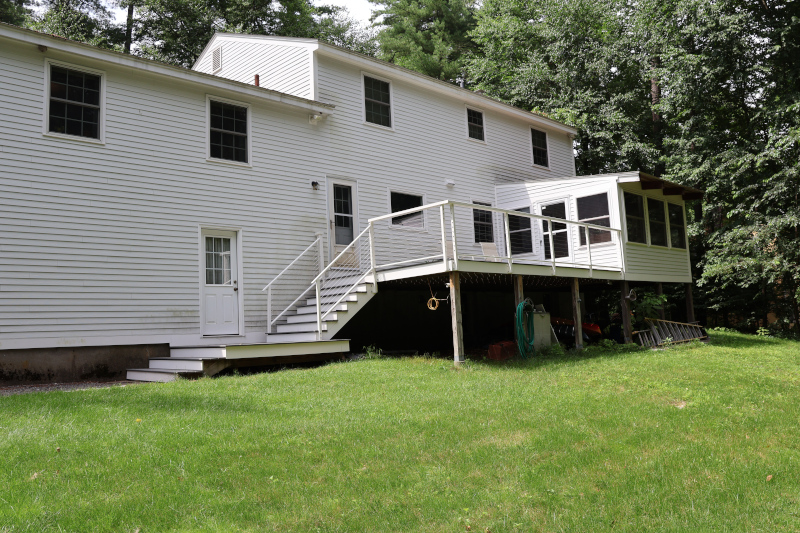
The railings turned out great! Actually, too good… After seeing the finished railings She Who Must Be Obeyed decided that we needed the same sort of railings for the front entry and the stairs up from the driveway. I couldn’t argue with this, these additional railings were needed for safety. So, drag out the welder and keep going. I had actually planned for this and ordered enough steel tubing initially to cover this. A few days of fabrication, three coats of paint, a trip to Harbor Freight for an SDS concrete drill to mount railings on the sidewalk, and the front of the house was ready for winter ice.
With everything finished it was time to call the mechanical inspector for a final inspection and then move on to electrical. About that… When I called I was informed that electrical had to be completed before mechanical could be signed off. Sigh. Why couldn’t they have told me this last fall?
OK, put together an electrical materials list for the three season room, get the parts, and start wiring. Of course it wasn’t quite that simple. We have an emergency generator wired into the main electrical panel – we tend to have trees come down on power lines in the middle of winter, and have had power outages lasting up to two weeks. Part of the electrical plan was to move the generator inlet from inside the three season room (previously known as a screened in porch) into the garage. This was an additional several days work.
Of course it wasn’t quite that simple. Between the time we started this project and now we were forced to get rid of our 10 year old, 300,000 mile CMax. We replaced it with a Ford Mach-E, which is an electric vehicle. This meant adding a 240 volt EV Charging Station in the garage. “Normal” people do this with a 30 amp circuit and a dryer outlet. I looked at the specs for the Ford Charging Station we selected and saw that it could charge at up to 48 amps. Since continuous electrical loads require that a circuit be de-rated, a 60 amp circuit was required. No problem! All it requires is 6 gauge wire and a 60 amp tandem breaker. Except that the main panel is completely full… Nothing that a few hours studying the existing circuits to allow combining some circuits as well as shuffling around some existing breakers so that the new tandem breaker can be installed won’t handle.
The wiring for the generator inlet and the EV Charging Station were combined into a single project so that a single new conduit could be run from the main electrical panel to the garage. A total of three 6 gauge wires and four 10 gauge wires were required. An electrical fill calculation showed that 1″ electrical conduit was needed, so 1-1/4″ electrical conduit was used. The new SDS drill was used to drill a 2″ hole for the conduit through the one foot thick basement wall, making this job easier than originally planned. (The fittings for 1-14″ conduit are 2″ in diameter.)
With the generator inlet out of the three season room the new electrical wiring was installed. A rough electrical inspection was scheduled, and the inspector found a few minor things to quibble with. The final electrical inspection was scheduled and passed.
At some point during this time we picked out new flooring for the three season room. We chose a solid vinyl plank flooring with is about 1/4″ thick and very heavy. It should also be very durable. And very waterproof. This of course took me several days to install.
Now, finally, I could call for the final, final, final inspection. Which passed. And there was much rejoicing! This three month project was completed in under a year, which I’m going to claim as a win.
About how heavy the railing is: the inspector tried to wiggle it and noted that it was absolutely solid, completely rigid, and didn’t move at all. He laughed and said that he wasn’t even going to bother checking for the 185 pound lateral load railings are supposed to handle.