
Since upholstery work is completely new the workshop needs to be reconfigured a bit to support it. The main features are a work table and an industrial sewing machine. I don’t have a sewing machine yet, but I have tracked down a source and hopefully will have one in a few weeks. In the meantime I can start work on some trim panels that don’t require sewing. Step one is a round of Shop Tetris to free up space around the welding table and empty a location for the sewing machine when it arrives.
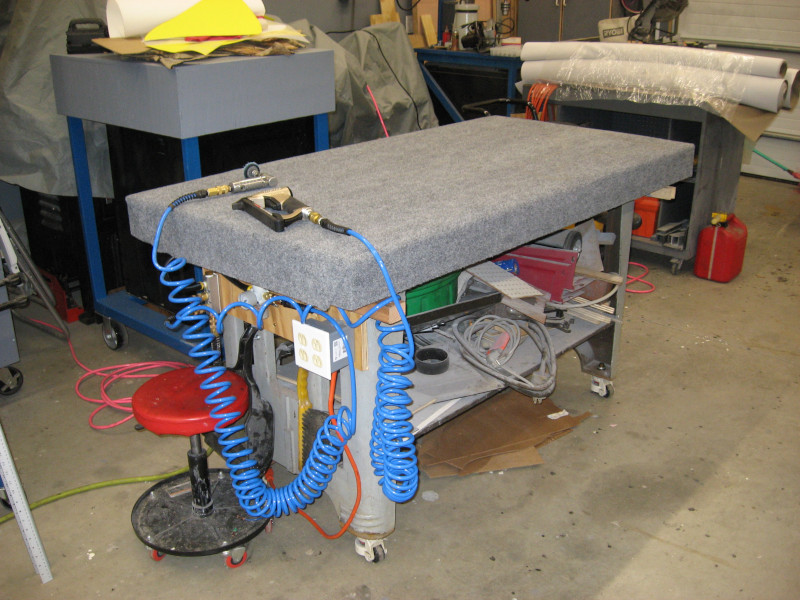
While the welding table is great, a steel surface isn’t ideal for upholstery. Some scrap plywood and a chunk of outdoor carpet dropped on top of the welding table converted it to a very sturdy work table. To make the table more productive I added a triple air outlet (to simplify the use of multiple air tools) as well as an electrical outlet.
Trim panels make extensive use of staples. A special type of staple – ones only 1/4″ long which don’t penetrate completely through the thin cardboard or hardboard used in these panels. Since you will be using literally thousands of these staples an air stapler is definitely the way to go. After a bit of research I ordered a Meite pneumatic stapler and a box of 10,000 staples.
The next item needed was fabric to build the test parts – specifically some fabric backed vinyl material. She Who Must Be Obeyed took me to JoAnn Fabrics where we found some vinyl on sale at 1/2 off and bought 6 yards. This was the first time I had been in JoAnn Fabrics as a willing participant. One thing to know is that they have a central station where they cut fabric to length and give you a slip of paper with the information you need to check out and pay. While standing in line at the register the cashier called out to me “excuse me sir – do you have the slip for that fabric?” I was able to answer “yes; I’m here with someone who knows what she is doing”. Apparently most guys don’t know how the store works…
We also picked up a couple of yards of 1/4″ thick fabric backed foam which is used on trim panels to give them a more luxurious feel.
I had enough scraps of 1/8″ hardboard left over from other projects to make the test panels and the first trim panels I wanted to do. Add in a can of spray contact adhesive and I was ready to get started! These first test pieces were just that – test pieces to be discarded after creation.
Getting started of course means reading the books on automotive upholstery I had previously purchased and spending many hours studying You Tube videos. I finally screwed my courage up to the sticking point, grabbed a cup of coffee, and started making a mess.
The process for making trim panels is basically cutting the backing to size, stretching the foam and vinyl over it, and stapling it on the back. With no bubbles, bulges, puckers, or wrinkles. Most trim panels have curved edges, making this a bit tricky.
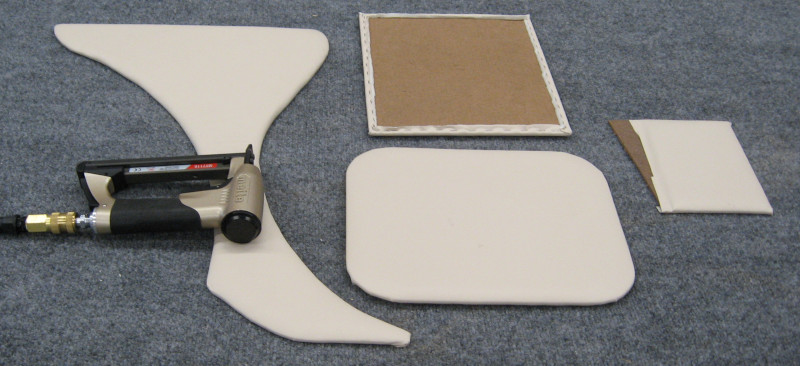
“Mistakes were made”. The first test pieces had significant room for improvement. No surprise; that was why I was starting out with throw-away pieces. As She Who Must Be Obeyed has observed several times “it isn’t as easy as they make it look on You Tube.” I’m aware, I’m aware…
Go back to You Tube, study details that I missed the first time around, and head back to the workshop.
The next test pieces were better. Still not perfect, but considerably better. Hmmm, almost like this is a learning process…