With the main seat insert largely under control it was time to deal with the next challenge – corners!
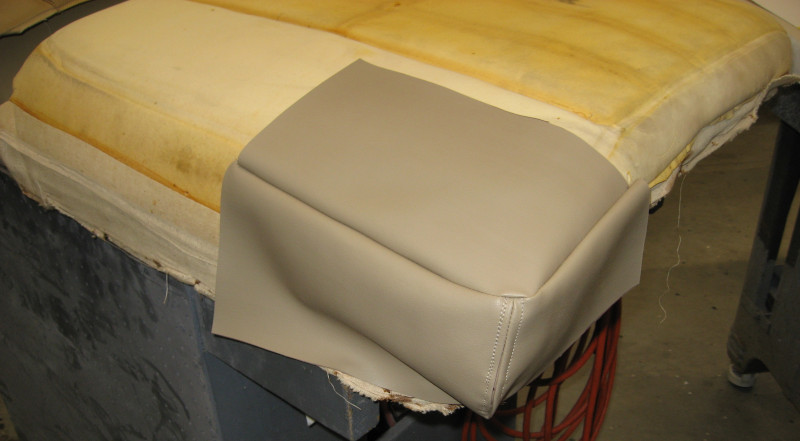
“But”, I hear you say, “haven’t you already handled corners in multiple places?” Yes – flat corners. These are three dimensional corners where the top, front, and side of the seat meet. Further, they are curved. The corners of the seat are rounded. Rounded side to side and front to back.
This complexity is the main reason I’m trying to use the original seat covering as a template for the new seat covers.
But before that it made sense to start with s simple corner.
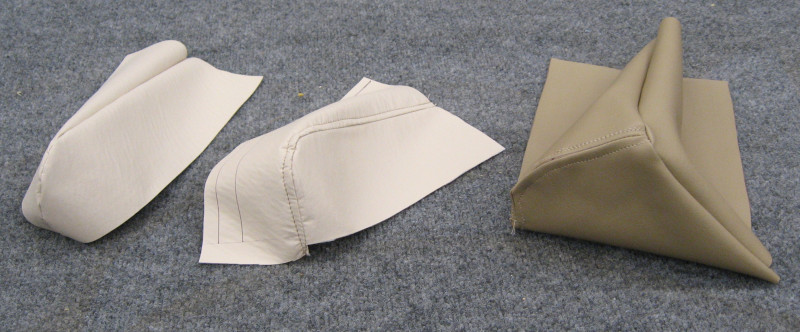
After achieving reasonable success with this simple corner I ratcheted my courage up a couple of levels and cut out corner pieces for one of the seat corners using the seat templates. These were partial pieces – I just used eight inches or so from each piece rather than the full two foot long piece. This is the piece on the right in the picture above.
I then fit the corner together with staples. This fitting process was an exercise in frustration. I re-did it several times until it seemed close. With trepidation I took it to the sewing machine and stitched it up. Sewing seams that curve in three dimension out of heavy vinyl seems to be an acquired skill. The piece is fighting you all the way – it really wants to go off track, bunch up (creating wrinkles), and in general just be difficult. But I finally reached the end of each seam.
The final result was, indeed, a corner. And it did fit over the corner of the seat. But it still needs work. I need to take the lessons learned and do at least one more test piece.