
The old style seat covers in the Imperial wrap around the back of the seat frame and are secured to the frame with hog rings. The factory sewed cloth extension onto the sides of the seat for this attachment, which made sense when the seats were made of leather. See the gray cloth in the pictures below.
For me, however, this means multiple extra pieces that must be layed out, cut, and sewn together. Since I’m doing everything from scratch, it makes sense to just extend the existing side panels to directly incorporate the attachment points. “All” that this requires is combining two existing pieces into a single new piece. Easy, right???
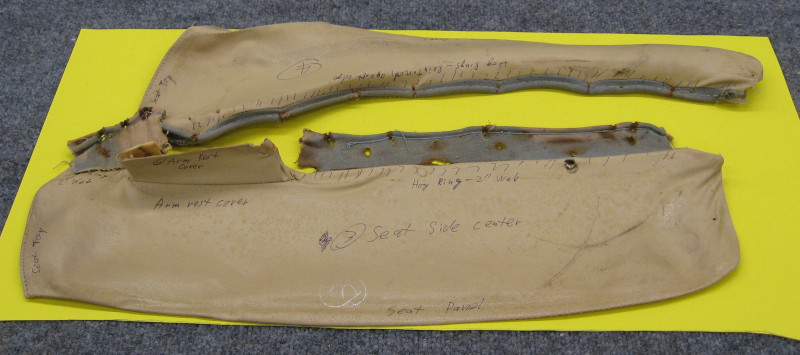
Fortunately the layout was fairly straightforward. It required considerable thought on how to deal with the seam allowance when the two pieces were combined. Further, all of the edges that attach to the frame were reinforced with piping to improve resistance to the hog rings tearing out, so a piping allowance had to be included.
And, of course, based on my experience I had to double and triple check that I wasn’t combining the pieces upside down, backwards, or on the wrong side of the part, including the wrong seam allowance, or measuring from the wrong datum.
After considerable tracing, cogitation, measuring, drawing, and cutting I had three cardboard patterns for each piece:
- The pattern of actual final net shape of the piece. This is used for fitting, checking, and for tracing the seam allowance lines onto the vinyl.
- The pattern for the new piece with seam and attachment allowances added. These were clearly labeled with what other piece attached to each edge and where piping was to be sewn in.
- The old pattern with seam allowances which did not include the attachment points. I don’t think I will need these again, but I will keep them just in case. These patterns had OLD written on them in several places.
Time to cut all of the new parts out of the junk vinyl, sew them together, and see if they fit the seat!