
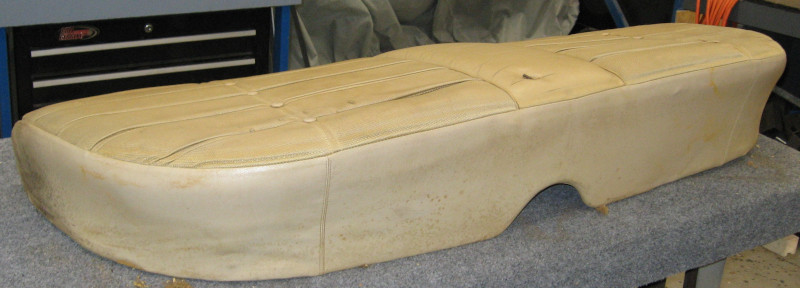
Well this is a milestone! The bottom of the rear seat has been completed and installed in the car. And it isn’t half bad!
The starting point was rough: worn, torn, pleats filled with crumbling foam (and foam powder), and just generally shot.
Unfortunately I got focused on making and finishing the seat and forgot to take progress pictures as I went along. At least this spares you the long drawn out description of the process.
Surprisingly I didn’t have my usual gallery of mistakes, errors, and screwups to document. It actually went fairly smoothly. Maybe I’m learning?
Well, the big exception to no problems was the foam. The original foam was in horrible shape:
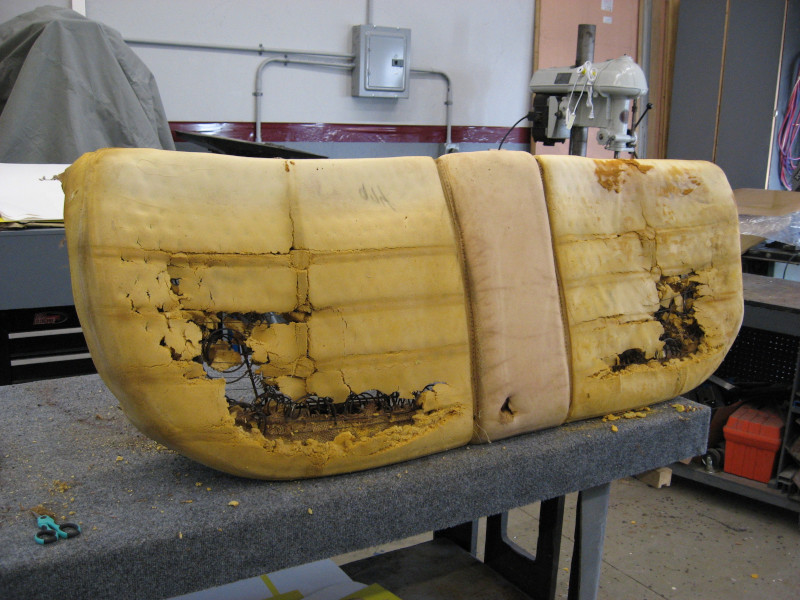
Yeah, that can’t be reused. Or even repaired and saved. Has to be replaced. Fortunately I had already purchased a sheet of 1″ thick upholstery foam for just this purpose.
The initial plan was to cut the new foam about 4″ larger on the front and wrap it down the front to avoid feeling the front of the seat frame. So I did that.
After sewing up the seat cover I did a test fit over the naked seat frame and it seemed to fit. Encouraging! Or a setup for calamity… In either case I forged ahead.
The first step in installation is to put a layer of burlap on top of the springs to avoid the springs digging into the foam and destroying it. Since I bought extra burlap I installed a double thick layer, securing in place with hog rings.
Now to lay the foam on top of the frame and test fit the seat cover. Hmm, not gonna work. Upholstery foam is quite dense – has to be to support my chunky butt. The “1 inch” foam is closer to 1-3/8 thick and doesn’t wrap over the front of the frame at all well. The seat cover doesn’t hold it in place and doesn’t fit at all. OK, time to take a step back and regroup.
If a 4″ overlap is too much, cut it down to 2″ and test fit the seat cover. Nope, still doesn’t work. This foam is just too dense, too thick, and too stiff to wrap over the edge.
Take another step back. Give up on wrapping it over the edge. Cut the front edge about 1″ oversize and bevel it at 45 degrees. The theory here is that this will allow the foam to squish over the edge a bit, preventing you from feeling the seat frame while sitting down, yet allowing the seat cover to fit..
NOW try test fitting the seat cover. Hmm, it seems close. It looks like the cover will be pulled into place making everything neat and tight when it is installed.
Duct taping my courage in place I flipped the seat over and grabbed the hog rings. After checking the left to right alignment of the seat cover I started in the center of the front. A few hog rings attached the front of the cover to the seat frame. I then went around the worktable to the back of the seat and stretched the center of the seat cover into place. To my amazement I was able to stretch the seat cover into position and hog ring it to the frame!
Well, that seemed to work. Holding my breath I flipped the seat over and checked my handiwork. To my surprise it looked great! The cover was tight enough to stretch into place cleanly, but not so tight that it would tear out. The few wrinkles easily wiped out – and looked like they would be pulled out when I finished the installation.
Flip the seat back over and continue installing hog rings. Keep working from the center out, alternating front and back to keep a balanced tension on the seat cover. Coming to the ends of the seat I worked the wrinkles out of the cover, stretched the cover into position, and installed the last of the hog rings.
Now for the penultimate moment of truth (penultimate is the fancy word for next to last): flip the seat over and work it for adjustment, alignment of seams and edges, and smooth out any wrinkles.
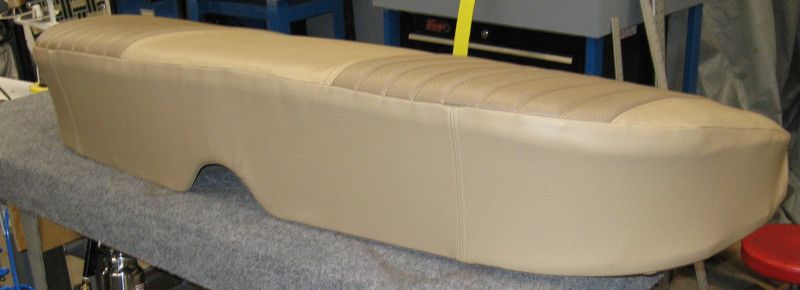
Umm, it worked… The seat actually looks good! the seams look good, it fits properly, there aren’t any wrinkles, and nothing jumps out as an issue.
Now for the ultimate moment of truth: installing the seat bottom in the car. Will it fit? Is the new seat foam so thick that it won’t go under the seat back or between the sides of the car. How will it look? Will it collapse as soon as I sit on it?
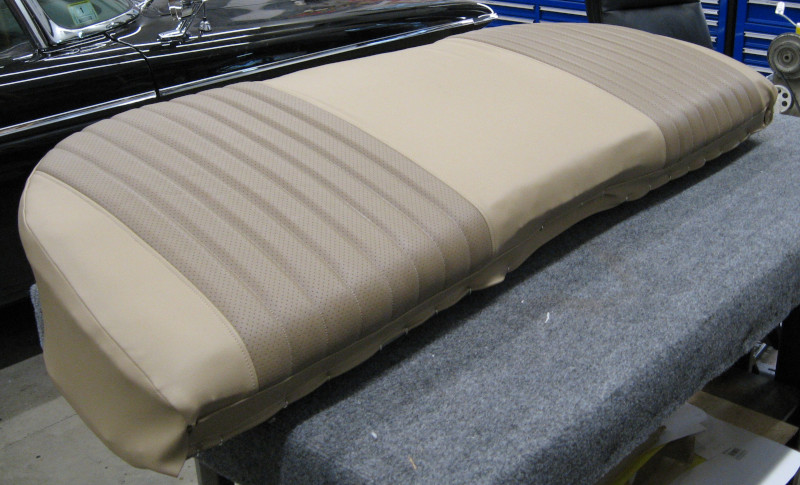
To my surprise – nay, to my amazement! – it slid into place, looks great, and sits comfortably,
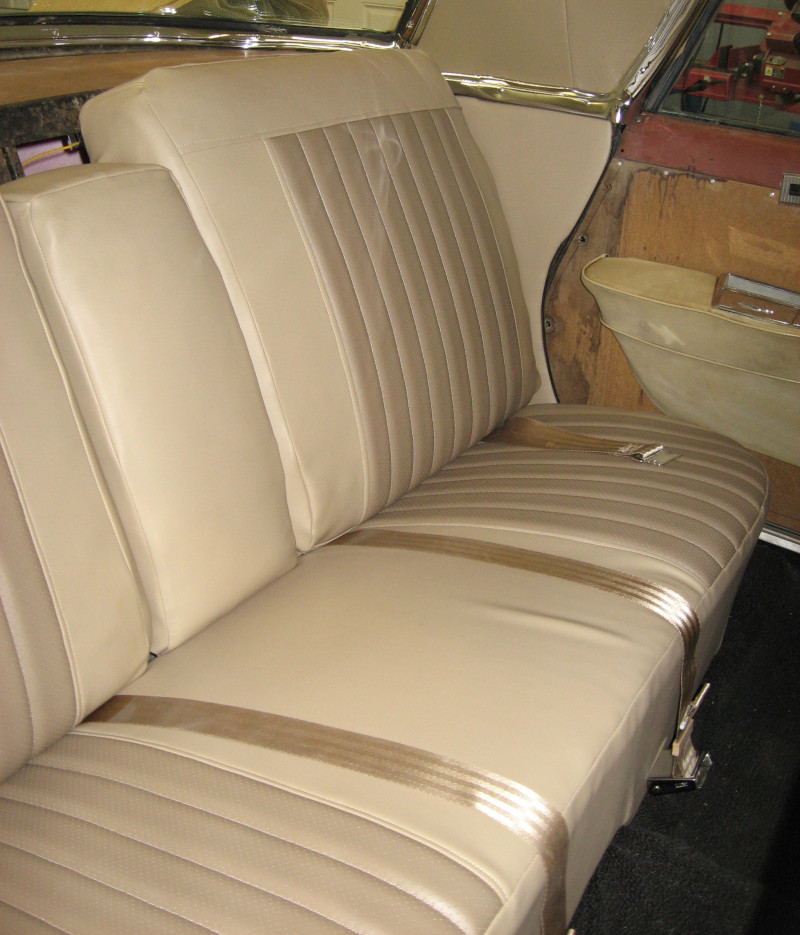
The biggest surprise, and one of my greatest concerns, was that the inserts on the seat back and seat bottom actually lined up! I had been sweating this and wondering if the inserts were actually a good idea.
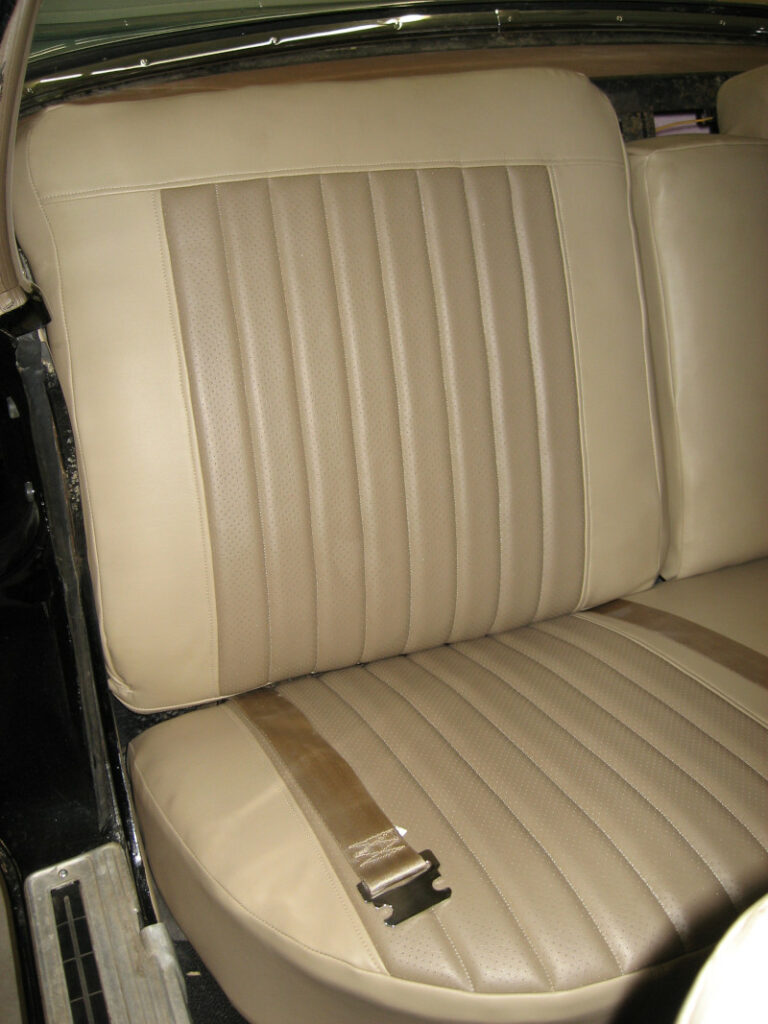
While the rear seat isn’t perfect it is rather good for a first attempt – better than I was really expecting when I started this project. It is certainly much better than what was there before!