
I’m not happy with the replacement foam on the back seat. I need to do something better for the front seat – after all, this is where I will be sitting! OK, drag out the new foam, cut it over size, plop it on top of the seat frame, and start studying the situation.
The challenge is how to wrap it over the edge of the seat frame and have it hold its shape. The soft foam previously used on the front seat wrapped over the edge easily; it provided no guidance.
Unlike the seat covers you can’t use hog rings to secure the foam to the seat frame. There isn’t enough surface area on the seat frame to use contact cement. Welding is out – I didn’t even try. Maybe loop rope or cord through the foam and around the frame?
Just a minute – what about sewing the foam to the frame? All of my sewing has been using the machine which clearly won’t work here. But what about old school needle and thread? I have plenty of heavy thread. But what about a needle? Just a minute – they make heavy duty needles for sewing things like carpet and leather! Would that work here?
It turned out that She Who Must Be Obeyed actually had a package of heavy duty needles which she graciously allowed me to use. Let’s do this!
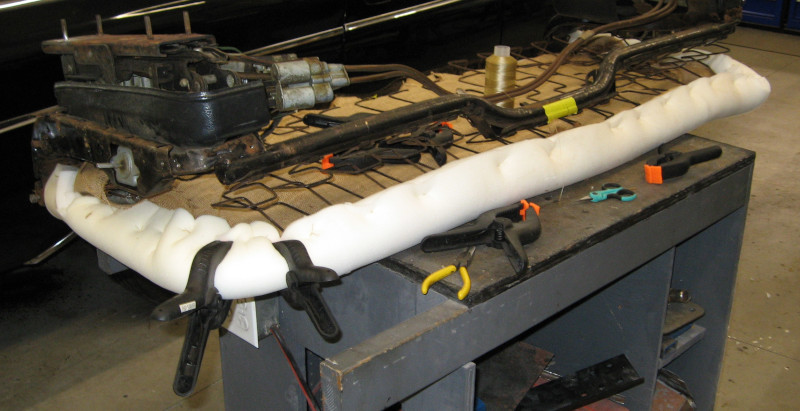
Trying the novel approach of thinking before acting I realized that the foam was likely to move when I started wrapping it over the front edge of the frame. OK, just start by sewing it to the back of the frame first. Trying a few different approaches I discovered that the large needle easily penetrated the foam and that it was better to do a separate loop for each connection to the frame rather than trying to sew a seam.
With the back secure I tackled the front, starting from the middle and working out. Wrap the foam over the front of the frame, select a point on the frame to loop the thread around, and knot it in place.
Not so fast! I can’t seem to hold the foam securely in place while running a needle through the foam, around the frame, back through the foam, and tightly knot it. If only there were some way to clamp it in place… Oh, wait – I have clamps!
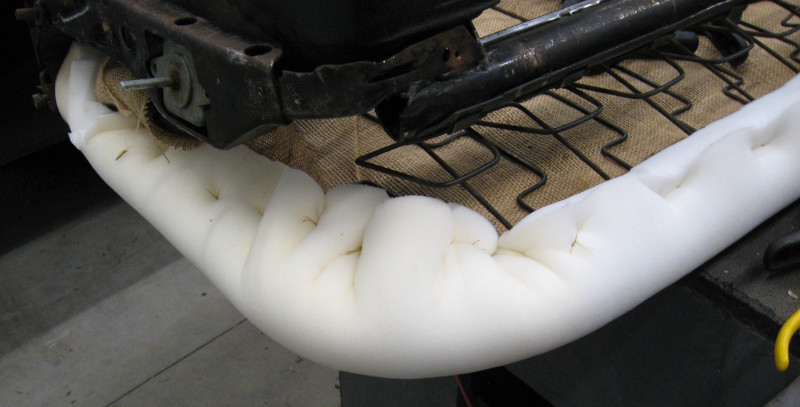
Well, would you look at that! The foam is actually wrapped nicely over the front of the frame and ready to fit and secure the cover.
The next question is whether or not the cover will work. The first check is to take the panels and drape them over the seat to see if they look like they will fit.
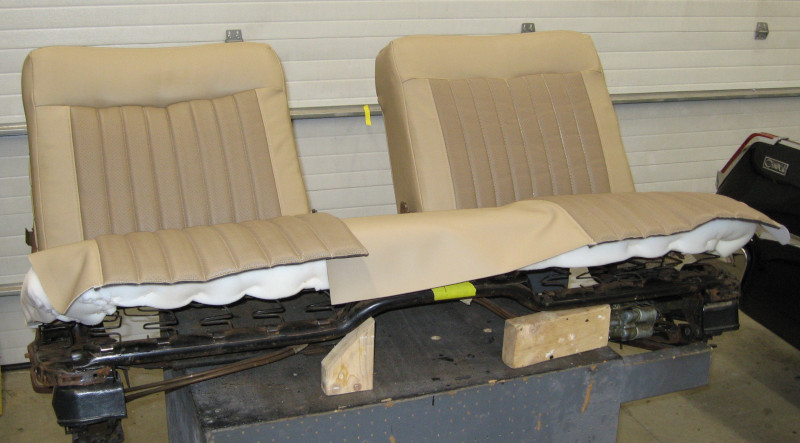
A really rough fit of the cover panels is encouraging – it looks like this will fit after some trimming and adjustment.
I can’t be sure until the job is done, but it looks like this is going to work!