
With the existing trim around the column between and back doors upgraded and looking good my attention turned to the rear trim pieces. Despite years of searching, I haven’t been able to find any more of the U-shaped spring trim. OK, if I can’t find an exact replacement, could I make something that would work?
Every problem now looks like something that can be solved with a 3D printer. I can’t come up with a way to make the entire clip as a single piece – but what about making a series of 1/2″ or 1″ clips and stringing them together? It! Could! Work!
Fire up Fusion, sketch out a 1/2″x1/2″ U-shaped clip, extend it to 1″ long, knock it out on the 3D printer, and optimistically head to the Imperial.
Where it didn’t come anywhere close to fitting. Not to mention that there is a piece of door weatherstripping right where the clip would go.
OK, time to study this edge of the door opening more closely. Nope, nothing like the edges of the center column. Completely different shape.
Study the situation more closely. There is an L-shaped turned in edge on the door frame with the filler piece fitting inside the L. Dredging up the distant memories of long lost design skills, maybe a piece that locks into place at three points on the profile of the door frame could work? This would cover the top of the frame and extend down onto the filler. With the right design the printed plastic should have enough flexibility to snap into place and enough rigidity to lock into position.
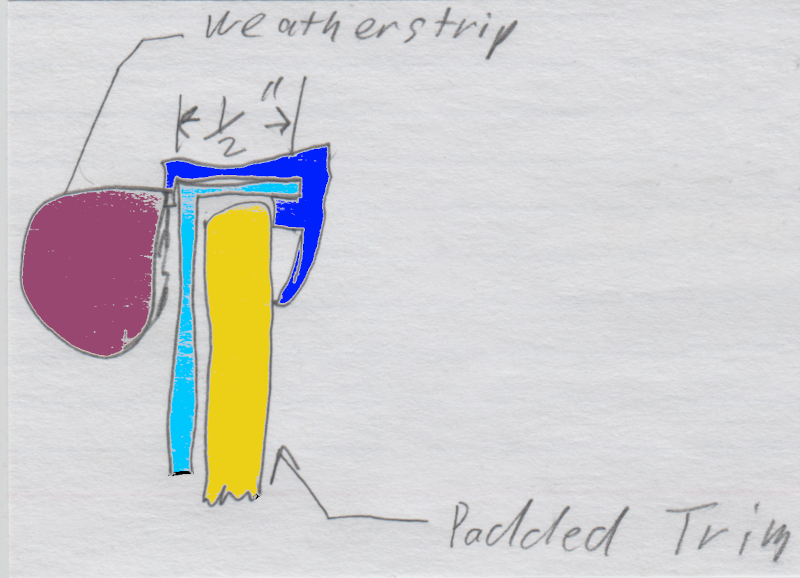
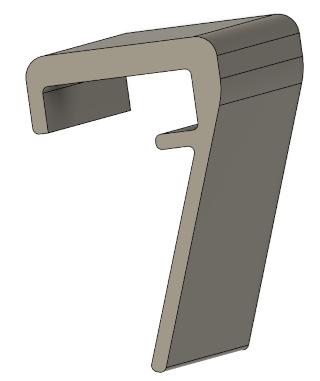
Take a set of measurements across the door frame and filler piece, head back to Fusion, and start to design. The design went surprisingly quickly – leading me to suspect that it wouldn’t work… It is a small part, so it prints out quickly.
Head over to the car and try to snap it in place. It almost works. Which is actually quite encouraging! OK, the top needs to be a bit wider and the throat needs to be a bit deeper.
Fusion is a parametric design system. This means that you can change a design simply by changing dimensions. I was able to modify the design of the clip simply by changing two or three dimensions. And by changing I mean simply selecting a dimension and typing in new numbers – it was literally a 20 second job to change the dimensions and send a new part to the printer. And the new part printed in 7 or 8 minutes.
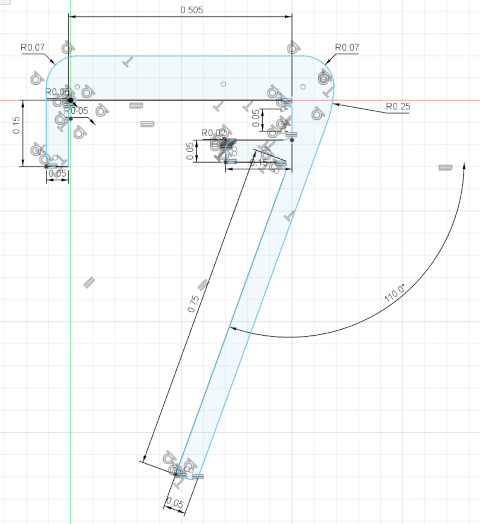
The new clip was closer but could still be improved. Version 7 of the design was finally the one I wanted. This wasn’t a problem – it was a very common example of the iterative nature of engineering design. The beauty of modern technology is that I was able to go through these 7 iterations an about an hour and a half with little effort!
With a profile that worked the next step was to extend this profile along the door frame – which had a variety of curves. The solution was to create a set of clips in 1/2″, 1″, and 2″ lengths. I then created multiple copies in the printer software and printed out 24 clips as a single job. This took about three hours, so I let it run and came back the next day.
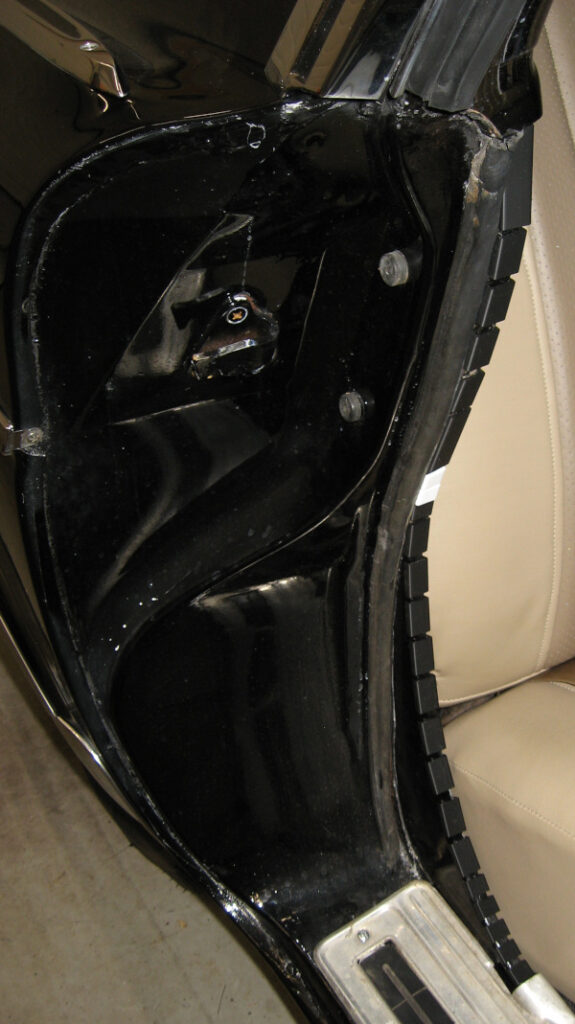
Starting at the top I snapped the clips into place on the door frame, using 2″ clips for the straight sections, 1″ clips for the slightly curved sections, and 1/2″ clips for the most tightly curved sections.
Once again it almost worked. Most of the clips fit fine, but there was one place where they just wouldn’t lock into place. Oh! There is a doubled thickness of sheet metal where two panels meet! Look at what needs to be changed, head back to Fusion, and print off a modified clip. This time it only took me three iterations to get something that worked.
Finally! A set of clips covering the entire edge of the door frame.
The next question is how to wrap them with vinyl? They have to be removed from the door to do this, and 22 loose clips will be a pain to wrestle with. Fortunately two birds could be killed with one stone. I was concerned about the clips printing through the vinyl, and had planned to cover them with 1/4″ foam. By gluing the foam to the clips while they were still on the car they would stay in position while wrapping the vinyl.
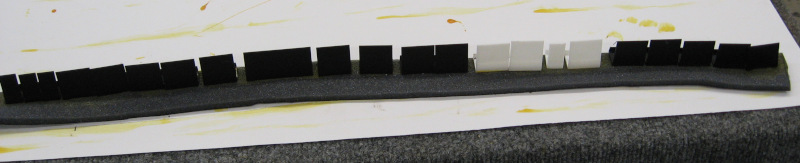
Worked like a charm. Glue the foam to the clips, carefully pop the clips off of the door frame, take everything over to the bench, finish gluing, and wrap it with vinyl.
Take it back to the car and carefully snap each clip in place. And Viola! – good looking trim around the back seat!
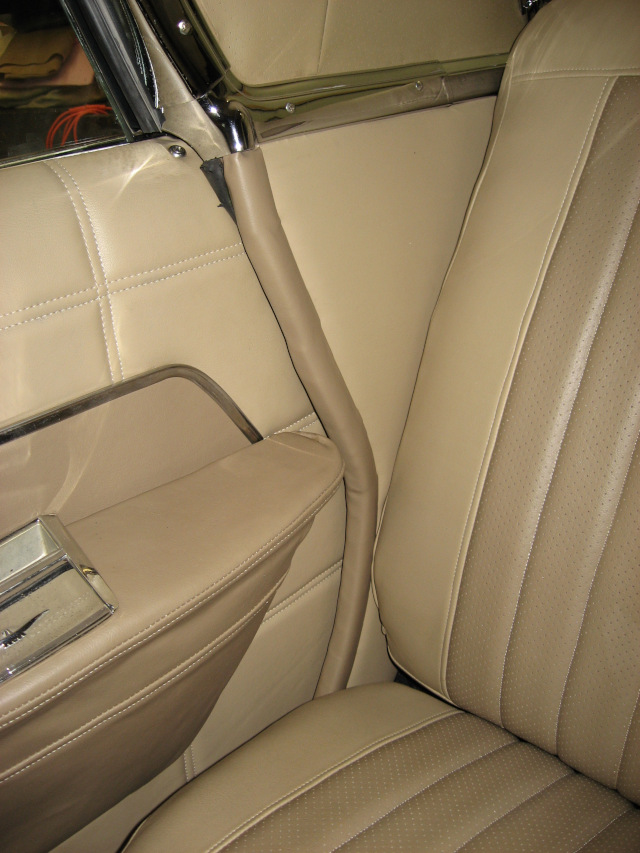
This is a major change from when I first got the car. The interior has gone from horrible to something I’m reasonably proud of.