
I have never done anything with a sewing machine. I have to learn everything from scratch. Using a technique known as a cannonball dive into the deep end of the pool.To summarize the early results, I suck at sewing.
Exactly as expected. At least for this stage in the game.
There are some essential tricks to starting stitches on a sewing machine – basically you have to hold the two threads (spool and bobbin) when starting a seam. If you don’t know these tricks life gets ugly immediately. Fortunately She Who Must Be Obeyed was kind enough to show me these tricks and I quickly mastered sewing seams in scraps of the junk vinyl.
Next was sewing straight and curved seams. My straight seams were curved and my curved seams didn’t follow the line. Again, as expected.
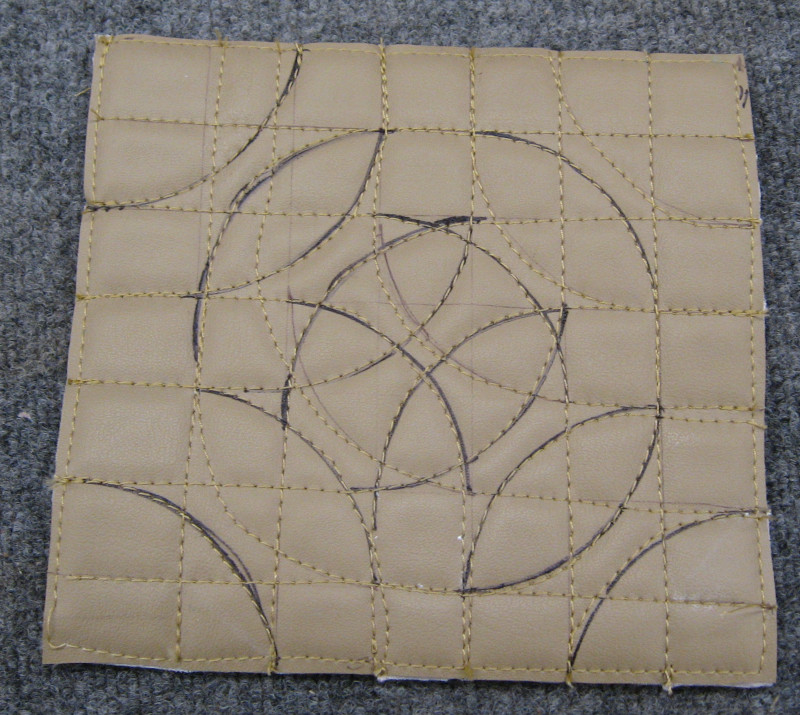
I cut out some squares of vinyl and drew a checkerboard of horizontal and vertical lines at one inch spacing. I also drew rounded corners between the lines. I then proceeded to sew along the straight and curved lines. As if by magic, the more times I did this the better the results were!
After a few days of practice I was doing reasonably well with the most basic of basics: operating the machine and following a line with a seam. I also had a sore back and a stiff neck from crouching over, concentrating intensely, and exercising fine motor control of both me and the machine for several hours. Time to move to the next set of skills!
I have a design in mind for the seat covers. I want an insert with vertical padded pleats in the middle of each seat, surrounded by a flat border. The pleated insert will be made of perforated vinyl and the border of solid vinyl. I also want the corners of the insert to be rounded, not square.
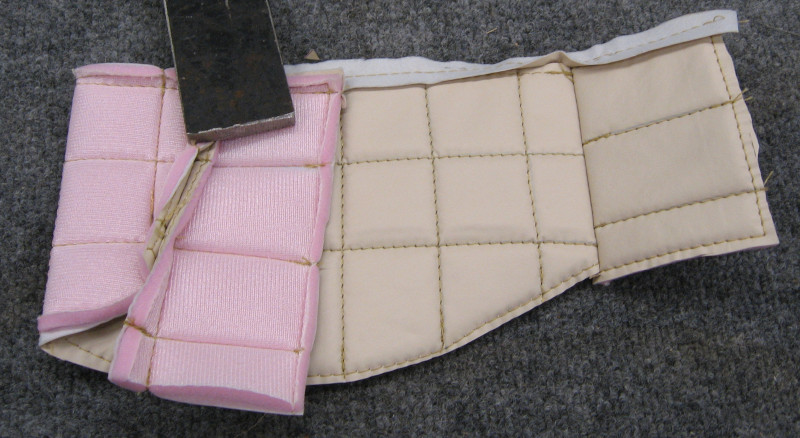
The padded pleats are made by sewing the vinyl to 1/2″ thick sew foam. This is a thicker version of the 1/4″ sew foam that I previously used on the door trim. The result is that the foam and vinyl are squished together along the seam and expand to the full 1/2″ thickness between the seams giving the padded effect.
Sewing something over 1/2″ thick requires practice. Which means cutting out practice squares of vinyl and sew foam, drawing pleat lines and curves on them, gluing them together (so the vinyl and foam don’t shift), and sewing them together.
Once again, I suck at sewing. Once again, practice leads to improvement. Once again, I had a sore back and a stiff neck from crouching over, concentrating intensely, and exercising fine motor control of both me and the machine for several hours.
One of the challenges with padded pleats is that the distance between seams shrinks compared to flat material – the material has to go up and down as well as across. In this case the shrinkage is 1/16″ per seam. In other words, if you want the final insert to be made of 2″ pleats, each pleat on the pattern has to be 2-1/16″ wide. Not a big deal as long as you know about it and include the compensation when laying out the pattern.
Time to put all the pieces together and do a complete seat panel. This is a three step process: first, sketch out the design for the panel showing all of the pieces and dimensions. Second, lay out each piece to exact size on a sheet of posterboard and cut them out. Then take each of these pieces and add 1/2″ all around them for a seam allowance. For the padded insert, add the 1/16″ compensation for each pleat and then add the 1/2″ seam allowance around the edges. Make a set of posterboard patterns with the seam allowance.
Third, take the pattern pieces with seam allowance and place them on the vinyl material. Arrange them to minimize the amount of vinyl wasted when you cut them out. Trace around the pattern pieces. Place the actual size pattern pieces inside each piece and trace around it – this gives you the seam lines that you will sew along. Then cut out each piece and sew them together. Sounds simple enough…

Now to exercise everything at once: Start by sewing the pleats to the insert. If the border is multi-piece, sew these pieces together. Then sew the border to the insert.
Once again, I suck at sewing. Once again, practice leads to improvement. Once again, I had a sore back and a stiff neck from crouching over, concentrating intensely, and exercising fine motor control of both me and the machine for several hours.
The result was several panels that steadily improved:
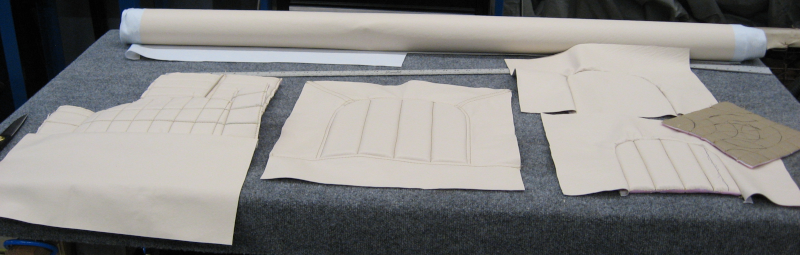
Ending up with a test panel that incorporates everything I plan to include in the actual panels. While there is still room for improvement in my technique, this one isn’t completely bad. I’m beginning to think that I might actually be able to pull this off!
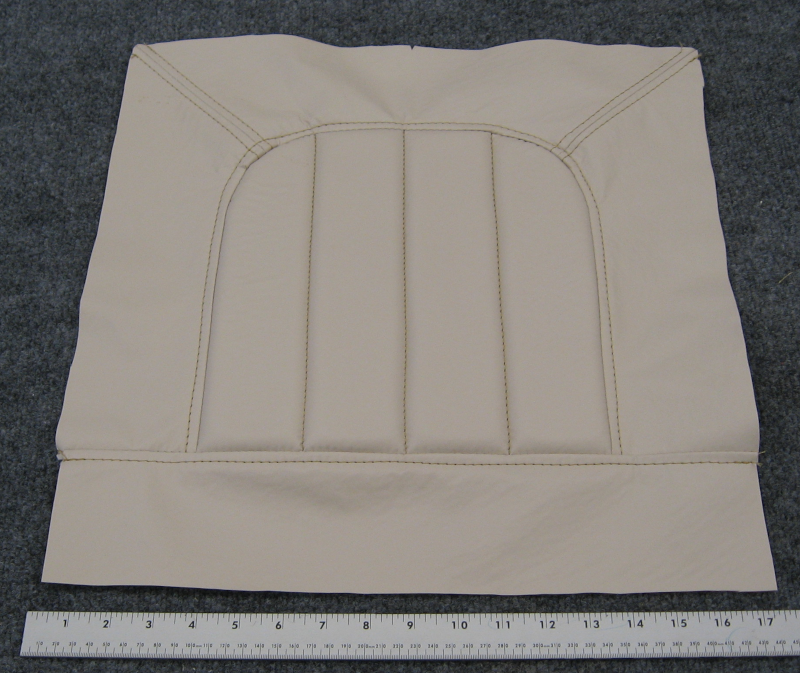
Since the test panel in junk vinyl turned out OK it made sense to create another test panel using the good vinyl.

Not too bad. This is basically the image I had in mind when I started. The colors are fine. It wouldn’t hurt if the insert were a slightly darker shade of brown, but these colors work well. It is interesting experiencing the differences working with the thin, stiff junk vinyl vs. the heavy and supple production vinyl.
I think I’ve learned enough to start working on the actual seat cover. Of course starting with the junk vinyl and going through the learning curve of working with a complete 3D cover, not just a “simple” flat panel.