The test cover was just that – a test. The actual vinyl is different – heavier and harder to stretch. And the test cover could have been a fluke.
One way to find out – stop stalling and make a real seat cover! Drag out the production vinyl, arrange the templates, find the marking tools and scissors, grab a cup of coffee, and start making things real. Or making real mistakes; time will tell…
The first step was to make the pleated insert. Sharp eyes will notice something wrong with the inserts – they have square corners. I really wanted the rounded corners, but ultimately decided that my skill level just isn’t there. Yet.
Even using the square corners I still cheated. Recall that the panel shrinks when sewing padded pleats. I compensated for this but the insert was still a tiny bit off in size. Since the insert isn’t full width it requires additional panels on each side. I cut these panels over size, sewed them to the insert, and then used the template to cut the entire panel to the exact finish size.
Once the center panel with pleats was done all that was left was to cut out and sew the rest of the seat back. Which may have been a slightly larger job than this sentence suggests…
In any case it was finally done. It took a bit of time and brute force to fit the finished cover over the seat back and line up the corners, edges and seams. I had to take the cover off, move it a tiny bit, and fit it again. Several times. But things finally looked halfway decent. Take a deep breath, flip it over, and start securing the cover to the frame with hog rings.
This is really the critical stage. This is when you stretch, pull, and tweak the cover so that everything lines up and there are no wrinkles. Hopefully. I tackle this job by working on opposite edges (top and bottom together then left and right sides together) going from the inside out and repeatedly checking for fit.
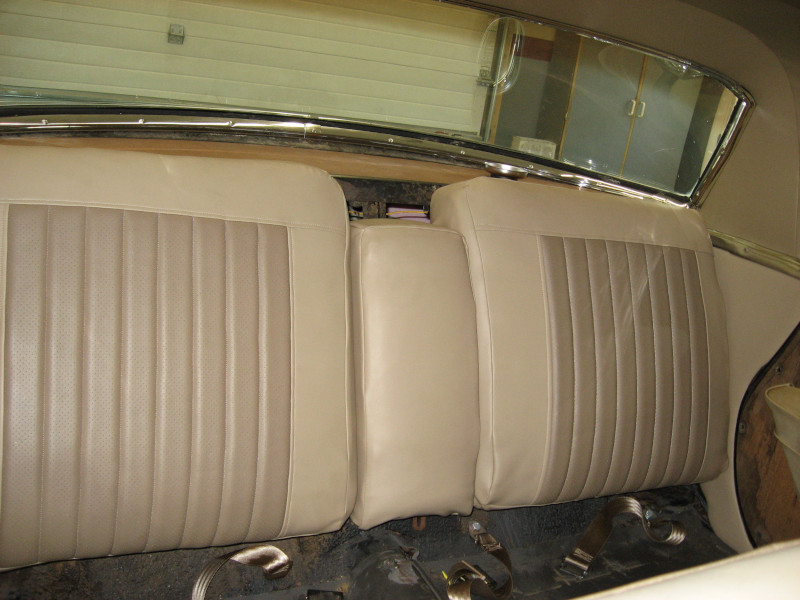
With the last hog ring installed it was time to flip it over and (hopefully) admire my work.
The verdict? Not too bad! Not perfect, but good. I know where every little issue and flaw is, but no one else will notice. I’m happy with it for a first attempt.
I got focused and didn’t get pictures of the build process, so here is the final result: