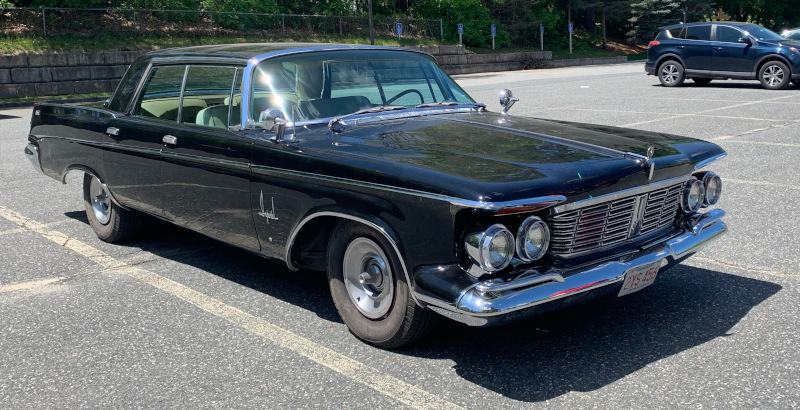
Retiring the Imperial

In Sounds of Silence we made tremendous progress on the interior – but weren’t quite ready to really drive the car.

I didn’t trust the tires that came with the car. They weren’t the right size for the car, were who knows how old, were rather worn, and two of them had slow leaks. Not confidence inspiring for running a 5,000 lb. behemoth down the Interstate! Or for driving on twisty New England roads.

With the Imperial ready to go, it was time for new shoes. The Imperial came with 8.20 x 15 tires. This is an obsolete size, which was replaced by L78-15 (not an exact fit) and later by modern metric size tires.

Somewhat surprisingly the original 8.20 x 15 tires are now available, even in the original whitewall. This wasn’t the case a few years ago. Companies like Coker Tire offer tires such as American Classic Radial that is basically an improved version of the original factory tires. They also offer bias ply tires which are the same as the original factory tires and offer a factory experience including a smooth supple ride, poor handling, and rapid tread wear. The bias look radials are expensive.

I’m planning on taking some long trips in the Imperial, so a modern radial tire is attractive. The closest size is P235-75/15; this tire is ~3% smaller than the factory tire and has a wider footprint. Several companies make this tire. I’ve had good luck with Michelin, and ultimately decided on Michelin Defender LTX.

The Defender is designed for light trucks and SUVs, so it has the weight capacity for the Imperial. Today’s SUVs are basically luxury cars and expect a smooth and quiet ride, so this should work. Reviews of this tire indicated that it is quiet and has a good ride, as well as good ratings for traction on dry roads, in the rain, and in light snow. It is also half the price of the Coker radials. The Defender isn’t available in whitewall, but I can live with blackwall.

BJ’s had the tires on sale. As far as I can tell, BJ’s always has tires on sale… In any case the Imperial is now sitting on four new tires.

I’ve only had the chance to take a fairly brief test drive, but I think I’m going to like these tires. With the new suspension, new sway bars, and front end alignment, handling was already improved even with the old tires.

With the Michelins the handling is more positive. The tires respond more sharply to steering input, there is less roll in corners, and the overall feeling is more secure. The ride is quiet (thanks to all the sound insulation), and smooth. There is some roughness going over bumps, which I think is largely due to the new shock absorbers; will see how it feels after I have a few thousand miles on the car.

At this point I would say the work has turned out well. Changes include all new suspension parts, front disk brake conversion, heavier front sway bar, added a rear sway bar, rebuilt power steering box, new shock absorbers, and new tires.

Previously the car was scary to drive – leaning and lurching in the corners, vague steering feel, considerable roll when turning, pulling to one side when braking, and noisy. It now corners flatter, is smooth, doesn’t make noise, and brakes straight. It isn’t a sports car, but it is much more confident and comfortable to drive.

Posted in Restoration | Leave a comment

Sounds of Silence

Previous: This Sucks

Imperials are known for being quiet. Mine wasn’t. It is now.

No carpet was big part of the problem, along with the removal of sound deadening undercoating described in Bottoms Down. While carpet is a good start, you can do much more. Of course you have to do this “much more” before installing carpet.

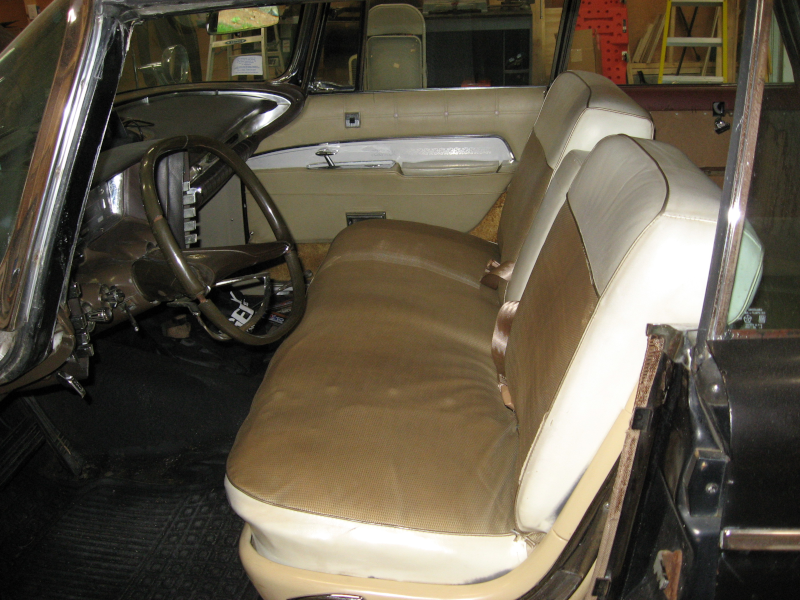
The first step is to remove the seats. The rear seats weren’t bad, but the front seat weighs 150-200 pounds and is awkward. Once again the engine hoist comes to the rescue – raise one end of the seat on the hoist and wrestle the other end. The hoist rolls as you move the seat, so this really wasn’t that bad.

Engine hoist used to remove front seat

With the seats out you can see how Chrysler used undercoating on the floors as well as the bottom of the car. Hmm, if it is on top of the floor is it undercoating or overcoating?

Front floor showing “overcoating” and wear

In any case the undercoating was thick under the seats and largely missing from the foot wells. Removing the overcoating wasn’t as bad as removing undercoating, but it still took me three days to get it removed and the floors cleaned. With the floors bare a coat of epoxy primer was brushed on – much neater and easier than trying to spray the inside of the car.

Front floor cleaned and ready for epoxy primer

There are two kinds of soundproofing materials used in cars – deadening and absorbing. Deadening is done by applying a heavy and viscous material that reduces vibration in metal panels. The original heavy undercoating did this as well as protected the bottom of the car from damage. Sound deadening can also be done with stick-on sheets of a heavy rubber mastic. The best known version of this is Dynamat, which is also one of the most expensive.

Digging around I found Noico which had good reviews and was about half the price of
Dynamat. Most sound deadening material is .050-.067 inches thick, while Noico is .080. Since sound deadening effectiveness is related to thickness the Noico should be good. Two boxes are enough for most cars, so I ordered three boxes. It was almost exactly enough.

This material consists of three layers: embossed aluminum top layer, rubber mastic middle layer, and a peel off paper layer. You adjust and trim the material to fit, position it, and roll it down until the embossing in the aluminum is flat. A somewhat tedious job, but much better than working on the underside of the car!

There are differing views on how much coverage is needed. Some people claim 60% coverage provides most of the sound reduction. The manufacturers of the sound deadening material suggest getting as close to 100% coverage as possible. You can guess which way I went…

Installing sound deadening mats

The other type of sound deadening is absorption. This uses a heavy urethane foam that actually absorbs noise. It also insulates heat, making it desirable for the firewall and floors. And possibly for the roof; haven’t decided about that yet.

Noico also makes sound absorbing foam, which gets good reviews and is low cost. It comes in two thicknesses: 315 mil (thousandths of an inch) and 150 mil. I had one box of each; thought I ordered two boxes of 315? Oh well, 315 for the firewall and front floors and 150 for the back seat. This mistake turned our for the best – a box of 315 covers 20 sq. ft., while a box of 150 covers 36 sq. ft. 150 is easier to work with and I ended up with very little left over.

Installation of the foam goes much like the mat: trim to fit, remove the backing, and stick down. The big differences are that you don’t have to roll it and you have to position it right the first time – the adhesive sticks as soon as it touches down, and you tear the foam trying to remove it. 100% coverage is needed for the foam to provide effective insulation and sound deadening.

Carpet proved to be a challenge. There just isn’t much aftermarket support for these old Imperials. I found one place that had it listed in their catalog and ordered it. The order was cancelled two days later as the carpet was no longer available. Well, at least they didn’t drag it out for months…

More research turned up another place claiming to have Imperial carpet. I contacted them to ask if it was actually available. They checked with their supplier and answered “yes, it is available and has a 6 week lead time”. Sure enough, it showed up 6 weeks later.

The carpet was a decent but not great fit. It had some tailoring for the transmission tunnel but just didn’t fit like factory carpet would. I was able to adjust, tweak, and trim it to a usable configuration but there are still a few wrinkles. Realistically, no one will notice with a black carpet.

The front seatbelts were reinstalled and new rear seatbelts added.

Carpet, foam padding/insulation, and new seat belts

With the carpet in and all the trim pieces installed this job was done.

Carpet Done! Silver cutouts are for front seat tracks.

With the sound deadening and carpet done it was time to dig out the engine hoist and reinstall the front seat.

Carpet and seat done. Try to spot the wrinkles!

With everything back together it was time for a road test to determine if all this work was worthwhile. Short answer: Yes!

Yes, it was absolutely worth it. The car is MUCH quieter than it was before. To the point that driving it is a different experience. There is almost no road noise and engine and exhaust noise is greatly reduced.

I could do more. Sound deadening it the doors is supposed to make a significant difference, as is a hood pad. Sound deadening and insulation in the roof is also recommended, as is sound deadening and carpet for the trunk. But right now things are so much better that there is no sense of urgency for tackling these projects.

Next: Retiring the Imperial.

Posted in Restoration | 2 Comments

This Sucks

Previous article: Aligned Inspection.

In an earlier article I claimed that the vacuum powered push/pull actuators for the heater air doors were working. This proved to be a bit optimistic… There was some movement from some of the actuators but the system didn’t seem to be working quite right.

I needed to do some serious diagnostics of the entire vacuum operated system. This would require running the engine for extended periods of time while connecting, disconnecting, and trying multiple components as well as trying to determine if there were any leaks. There had to be a better way…

Doing a search for vacuum pumps I discovered links to electric pumps for power brakes. These are used for things like cars with big cams which don’t produce much vacuum as well as hybrid and electric vehicles. Hmm, this could be a very useful tool for troubleshooting vacuum problems! And they aren’t that expensive – for example, this Viktor pump is less than $40. And it can be connected directly to the car battery. I learned that the vacuum pump has an unexpected feature: it shuts off when it reaches full vacuum. This proved to be a very powerful troubleshooting tool for detecting leaks. I discovered this when initially testing the pump with a vacuum gauge attached – the pump ran for a second and then stopped. I initially thought the pump was bad and then realized what was going on.

While considering different approaches to connecting to the car battery I realized that a portable power supply would be convenient. I’ve been considering getting a bench power supply for a while – these are useful for a variety of electrical projects as well as electrolytic derusting. So, add a Kungber 30V 10 amp power supply to the order.

Electric Vacuum Pump and Bench Power Supply. Apparently photographing black on black on black with a large white blob isn’t ideal…

Using this setup is simple and effective: remove one of the vacuum lines from an actuator, turn on the pump, and observe the result. Then connect the vacuum pump to the other side of the actuator and verify that it works in both directions.

Electric Vacuum Pump connected to Vacuum Actuator

Possible outcomes:

  1. The pump runs, the actuator moves to the side the vacuum is connected to, and the pump stops when the actuator reaches its limit of travel. This is normal operation for a good actuator.
  2. The pump runs and then stops but the actuator doesn’t move. The actuator is bad.
  3. The pump runs, the actuator moves to the side the vacuum is connected to, the pump stops when the actuator reaches its limit of travel but then cycles on and off. This indicates a small vacuum leak. If the pump is cycling every 20-30 seconds, probably nothing to worry about. If it is cycling every 2-5 seconds, the actuator is a candidate for replacement.
  4. The pump runs continuously without stopping. There is a significant leak in the actuator and it needs to be replaced.

There are four vacuum actuators in the Imperial. Two of these work, one works but the pump cycles on and off, and one doesn’t move even though the pump is running continuously – this one clearly has a large leak.. In addition, one of the actuator arms won’t stay on its air door, so a retainer clip is needed.

Of course replacement actuators aren’t readily available. The next project is to figure out how to replace or repair the bad actuator and decide whether the partially leaky one also needs to be replaced.

Next: Sounds of Silence.

Posted in Resources, Tips and Tricks | Leave a comment

Aligned Inspection

The previous article on Steering Wheeling brought us up to date on steering wheel cosmetics, turn signals, and horn.

The Imperial was drivable but didn’t feel quite right. Which wasn’t entirely surprising since the entire suspension had been off the car and every part replaced. The good news was that I could now drive it to the local garage for a front end alignment! A call was made, an appointment scheduled, and the car delivered to the tender mercies of the garage.

I will admit to being somewhat surprised that the alignment went smoothly. The car now feels good while driving it around. Not like a new car, and it is still a huge barge, but much better than it used to drive. No strange noises, minimal to no play in the steering, no sudden lurches when turning, and no “excitement”. With the upgraded front sway bar and new rear sway bar it corners flatter. I haven’t tried any “spirited” driving since I don’t trust the old tires. Time to get some new tires and check out the total driving experience.

Some really great news: I had asked the garage to do a “pre-inspection” of the items on the state inspection and give me a list of things I still needed to do for the car to pass state inspection. I was hoping this list would be under three pages…

The mechanic asked me a set of questions: “Do the windshield wipers work? Do the turn signals work? Does the horn work?” The answers were yes, yes, and no – but here is the horn relay that I received after I brought the car in which should fix that problem.

When I went to pick the car up I was informed that it passed inspection, the sticker was installed, and I was good to go. And there was much rejoicing! I’m now completely legal to drive the car wherever I want to!

Another pleasant surprise: they adjusted the choke while working on the car – and this fixed the problems with the engine! The car now starts easily, idles much more smoothly when warming up, idles quite smoothly when warm, and no longer smells like it is running rich. I should have worked on the choke months ago. In any case “and there was much rejoicing!”

While the car was in the garage I also asked them to check and charge the air conditioning – the work leading up to this was covered in Chilling?. I was informed that they found a few small leaks which they fixed and then charged it. The AC was cooling, but not very well. They observed that the original AC expansion valve was still installed, and that since this valve was designed for R12 refrigerant it didn’t work well with the new R410A refrigerant.

I’m an idiot. I had purchased a new expansion valve, and really knew I should have installed it. I checked the new valve and, sure enough, it was labeled for R410A. I ran the new valve over to them. They then extracted the refrigerant from the system, replaced the expansion valve, made a new hose to fit the new expansion valve, and recharged the system. They discovered that the old expansion valve was clogged with debris, which certainly didn’t help, and said the AC condenser and evaporator should have been flushed out when I had the AC system apart.

The AC still isn’t cooling quite right. At a minimum the vacuum controlled air doors aren’t working correctly – a known problem, see This Blows: the Vacuum Side. More work is needed, but progress has been made.

After picking the Imperial up it was time to drive to the gas station and fill it up. I’ve described the driving experience – I actually enjoyed driving it! The gauge was reading empty when I headed out. After filling the tank the gauge slowly moved up to Full! Again, “and there was much rejoicing!”

The fill up took 15.7 gallons of gas. Since the tank holds 22 gallons, this means that there are ~6 gallons left when the gauge reads empty. Not ideal, but easy enough to work with. And I’m happier filling up early than running out of gas.

Now for the bad news. I went out to the workshop about an hour after parking the Imperial to discover the strong smell of gas as soon as I opened the door. Looking under the car I could see a puddle of gasoline under the car, dripping from the gas tank. Quickly checking I determined that the gas was leaking around the fuel sender fitting. Not Good! I’m just glad I didn’t wait until the next day to go out there!

Since the fuel sender fitting is located near the top of the tank I was able to stop the leak by draining 6 gallons of gas out of the tank.

Fixing this leak will involve dropping the gas tank, removing the fuel sender assembly, adding gasoline resistant sealer to the existing rubber sealing ring, and reinstalling the gas tank. Annoying, but should be straightforward. The gas resistant sealer is on order and should be here next week.

The good news about this is that I should be able to bend the float arm on the fuel sender to make the gauge more accurate. We will have to see what happens…

Next: Troubleshooting vacuum actuators for the heating system in This Sucks.

Posted in Restoration | Leave a comment

Steering Wheeling

After making progess on the brakes in Stop It III plus More Good News it is time to turn.

Old steering wheels, especially from the ’50s and ’60s are horrible – cracks, gaps, splits, and missing pieces. My steering wheel was no exception.

Old Steering Wheel Showing Cracks

Unfortunately this is just a fact of life. The plastic in the steering wheel shrinks over time and becomes more brittle. The steel core of the steering wheel doesn’t shrink. Something has to give, and it isn’t the steel! It is almost unavoidable – old steering wheels crack.

Fortunately, something can be done about this! Unfortunately it is a lot of work. Even more unfortunately I also managed to screw up some things I shouldn’t have touched…

There are actually books on repairing old steering wheels – like Steering Wheel Restoration Handbook. Eastwood even has a kit for steering wheels.

With the kit in hand, instructions read, and steering wheel off the car it was time to start. The first step is a good cleaning: a good scrub in the parts washer to clean off 50 years of grime followed by a wipedown with Prep-Sol.

PC-7 epoxy is the recommended material for filling in cracks and gaps. It works well, but is sticky and stringy. This makes it a bit challenging to work with.

The procedure is to fill in the cracks and gaps, let it set, then file, grind, and sand it down even with the rest of the steering wheel. Or where the rest of the steering wheel should be…

At this point you discover that you haven’t completely filled in the cracks flush with the surface, so you repeat the process. You repeat the process over and over, getting closer each time. I did four or five coats, with each coat requiring more time finishing and matching the surface to the original steering wheel. A die grinder with a sanding disk works great for rough adjustments, along with hand sanding for detail work.

PC-7 is great for bulk filling of gaps and cracks but doesn’t do a great job of making a finished surface – the sticky and stringy nature of the epoxy makes it difficult to do fine work. The next step is to get out the auto body filler, add it over the PC-7, and grind and sand it down to a smooth finish. It took four rounds with the auto body filler to get something I was happy with. Each coat got closer, having to look more and more carefully for the final imperfections.

The next to last step is to spray the entire steering wheel with high-build primer and sand it down with 220 grit and 400 grit sandpaper. After two coats of high-build primer and careful finish sanding the steering wheel looked great! However it was a dull gray.

They don’t make standard paint to match the steering wheel color, so I took a piece of dashboard trim to the auto paint store and had them use their color matching spectrometer to mix up a quart of paint the same color as the rest of the dash.

In the paint booth of the WorcShop I applied four coats of paint to the steering wheel to give it a durable finish. It looks great installed in the car!

Finished Steering Wheel

Now for the confession of how I made life more difficult for myself: on the back of the steering wheel there is a copper disk that provides power for the horn. It is held in place by a cap, and the cap has two ears that operate the turn signal return. The insulating material for the copper disk was badly decayed, so I took everything off to replace it.

Steering wheel showing horn power ring and retaining ring with turn signal ears

Bad idea. Very bad idea! After doing this I wasn’t ever able to get the cap back in place properly. In fact I managed to damage the turn signal return ears and damage the turn signal switch itself. The expedient thing to do was simply remove all of this and live without a horn or automatic turn signal return. Which I did.

That was a short term fix. Long term I have to have a working horn and turn signal return. I was able to locate another steering wheel, but was warned it was in poor condition. When it showed up it was indeed in poor condition – even worse than the original steering wheel. Well, at least it was cheap!

As I contemplated starting the restoration process on the replacement steering wheel and examined the retaining cap – which I was NOT going to touch! – I realized that I could get the critical dimensions off of the replacement steering wheel. I decided to make one last effort at getting the original steering wheel to work.

I cut out new tabs and welded them to the old cap. I made insulators for the horn power ring out of rubber sheet and electrical tape and fitted the horn power ring in place. Since the old cap had been falling off, I added epoxy to the inside of the cap and then used a section of pipe of the proper diameter to drive it into firm contact with the horn power ring insulator.

As intended, the turn signal return ears stuck up too far. With the untouched replacement steering wheel for reference I could measure how far these ears should stick up, transfer this measurement to the original steering wheel, and grind the ears to the proper length.

Everything should now work. With the steering wheel bolted to the steering column, check to see if the little brass wheel is properly riding on the horn power ring. It is! And it continues to ride on the power ring as the steering wheel is turned.

Now to the turn signal. The ears don’t dig into the switch, which is good – they aren’t too long. But are they long enough? Left turn signal, then steering wheel to the right – and the turn signal cancels! Right turn signal, steering wheel to the left – and the turn signal cancels!

Great! Everything is working! Put the rest of the steering wheel assembly back together, hook up the horns, and press on the horn. Sounds of silence…

Troubleshooting determined that the horn switch in the steering wheel is working, the horns themselves are working, and the horn relay is dead. A new horn relay is on order which should lead to everything actually working. Test drives confirm that the automatic turn signal return is working, so I don’t have to worry about manually canceling the turn signals any more.

Update: it was the horn relay. A new relay has the horns beeping enthusiastically.

Next: Aligned Inspection

Posted in Restoration | Leave a comment

Stop It III plus More Good News

After the air conditioning work covered in Chilling? the power brake booster showed up and seemed to be in one piece. Which meant it was time to reinstall it, cross my fingers, and try the brakes.

So I reinstalled the booster, checked the brake plunger clearance with the new tool (it was within spec), and bolted the master cylinder to the booster. At this point I noticed that the brake lights were on. Fortunately this was solved by adjusting the brake light switch.

The next step was to add some gas – the tank was still empty from when I worked on the fuel sender. After a bit of cranking the 413 roared to life. It’s still running rough when cold, but I was able to try the brakes.

Success! The brakes had power boost! While this was a really good sign, it wasn’t definitive. It was time to drive the car and try the brakes. The test drive was almost anticlimactic – the brakes “just worked”. Plenty of boost, smooth operation, the brakes felt good, and the car stopped like it was supposed to. Unlike some of the older power brakes it isn’t over-boosted. There is good pedal travel and smooth progressive braking without grabbing.

And there was much rejoicing!

It felt like the brakes were dragging a bit, so some more adjustment might be needed.

Since the drive around the block went smoothly I decided to live dangerously and drove over to the gas station. This extended test drive was successful and provided more good news:

Speedometer

The speedometer is working with the new speedometer cable. I need to check the speed against GPS since the speedometer was grossly inaccurate before, so we need to see how close it is after being re-calibrated.

Gas Gauge

I added four gallons of gas initially, and then added ten more gallons at the gas station. Since the tank holds 23 gallons the gauge should show just over one-half. The gauge actually read just under one-half – close enough! The next step is to check it with a full tank. Everything considered it is better to have the gauge reading a little low than a little high – it makes it less likely you will run out of gas.

Exhaust

Most of the exhaust noise is gone. I still need to check a few things, but it is much better than it was.

Engine

As mentioned, the engine was still running rough when cold. After it warmed up it was a different story – the engine runs smoothly, idles smoothly, accelerates nicely, and re-starts instantly. The poor performance when cold may be largely a fact of life for a carburated engine – I’ve been driving fuel injected cars for so long I’ve largely forgotten how the old cars ran.

Overall

Today was a good day. More work to do, but a breakthrough compared to the last test drive!

Next: turning things around with Steering Wheeling.

Posted in Restoration | Leave a comment

Chilling?

The previous post Two Steps Forward. One Step Back. 1/2 Step Forward? covered mixed news on the power brake booster. While waiting for resolution on the brake booster I might as well tackle another job.

Air conditioning is vital. Yes, even in New England. When I got the Imperial I was told “the air conditioning was working – it just needs a recharge”. Yeah, right! This is one of the great lies of old cars, right up there with “it was running when it was parked” (20 years ago), “it just needs a tune-up” (meaning it is badly broken or completely worn out), and “it is rust free” (no such thing on an old car!).

The real story is that all the parts are there, the compressor turned freely and didn’t make unusual noises, and the compressor clutch engaged. These old Chrysler RV2 AC compressors are pretty well bulletproof, so the chances are good that there were leak(s) in the system that need to be fixed but it could be brought back to life.

Chrysler RV2 Air Conditioner Compressor

The plan of attack was to rebuild the compressor, replace the hoses, carefully tighten all the fittings, and see if it leaks. If no leaks are found, recharge with R134A refrigerant and enjoy cool driving.

The original plan was to send the compressor out to be rebuilt. However this is expensive, long lead times (8 -12 weeks), and very expensive shipping – the RV2 is about 30 lbs. of classic steel. Keep in mind that the AC compressor has to be installed to run the car – the belts for the alternator and water pump also run the AC compressor. I didn’t want to have the car out of commission for 2-3 months. Oh, who am I kidding – there are plenty of other things also keeping the car off the road!

A complete set of gaskets and seals for a rebuild is around $100, so I ordered those and had them sitting on the shelf. After all, “how hard can it be?”…

The first step was to pull the compressor off the car and take it over to the parts washer for a good cleaning.

Actually, the first step was to review the factory service manual and check YouTube videos to get an idea of what to do and to hopefully avoid mistakes. The RV2 is actually pretty simple, so it looked like I was good to go.

Pulling the heads was interesting. The gaskets were really stuck to the mounting surfaces – so thoroughly stuck that the gaskets themselves pulled apart! These old gaskets were really difficult to clean off. I ended up scraping with a razor blade and then cleaning up with a ScotchBrite Roloc on a die grinder.

AC Compressor Head with gaskets

While the RV2 is simple there are still quite a few parts that need to go back in the proper places. All parts were layed out on a clean workbench in the order they were removed and maintaining the relationships between the parts. The parts were cleaned and checked for wear as they were removed; fortunately everything seemed reasonable – some wear, but still serviceable.

RV2 Disassembled

Reassembly was straightforward – basically reverse the disassembly process. All internal parts got a good coating of AC Oil to avoid a damaging dry start of the compressor. My torque wrenches got a good workout – proper torque is critical for the connecting rod bolts, the head bolts, and the sump pan bolts. The smaller torque wrenches were used – 1/4″ and 3/8″.

One interesting challenge involved the piston rings. These rings must be compressed to fit inside the piston bore. The proper tool for this is a ring compressor. Of course I did’t have a ring compressor for these small (roughly 2″) pistons. But I did have hose clamps! I’m sure this isn’t the recommended approach, but it worked to get the pistons back in the bores.

Pistons and expedient ring compressor

With the compressor back together it was time to scrub it thoroughly with PrepSol to remove all traces of AC Oil from the outside, prime it with etch primer, and hit it with a couple of coats of black paint. Then stick it back in the car and move on to trying to find someone to make new AC hoses.

Compressor Re-installed in Car

Next: the power brake booster shows up. Is the second time a charm? Find out in Stop It III plus More Good News.

Posted in Restoration | Leave a comment

Site Move? Site Move!

The site has moved from imperialjourneyblog.wordpress.com to imperialjourney.org. What does this mean? All in all, not much.

I started this blog using free hosting from WordPress.com. This was an easy and, umm, free, way to get started. The only real downside was the somewhat ugly site name.

It looks like I’m going to keep updating this blog, and I had registered the domain imperialjourney.org, so I finally decided that it was past time and migrated the site. I now have the flexibility to make more changes to the site if I want to – but probably won’t actually change anything.

Join me here at the new and not especially improved imperialjourney.org for the same wonderful content you have come to know and love: semi-irregular updates on “progress”, reports on doing things the hard way, general whining, and the ongoing adventures in my little corner of the universe!

Posted in Misc | Leave a comment

Yet More Workshoppery Storage

Much of the work on the Imperial is on hold while waiting for the power brake booster mentioned in the last post. The next round of planned electrical upgrades are a tight fit to the brake master cylinder, so I’m holding off on that work until the power booster and master cylinder are back in place.

That means now is a good time for some more workshop organization! Getting things off the floor and out of the way is vital. One of the secrets is to put shelves over other things. Large shelves. Multiple shelves.

Which is exactly what I had back before the workshop was gutted for insulation and sheetrock – a set of three shelves over the air compressor. These shelves were not only missing from their mission of providing useful storage, they were sitting on the floor and actually part of the problem!

Time to give them the usual three coats of paint and stick them back up on the wall. Note the triangular corner brace to avoid having a leg going to the floor. This minimizes the impact of the shelves.

Corner Shelves

This is the only time this corner will be this clean. Shortly after this picture was taken there were things on, under, beside, and around the shelves – just as intended!

Posted in Workshop | Leave a comment

Two Steps Forward. One Step Back. 1/2 Step Forward?

After the Not a Good Day things seemed to be improving. In Tanks A Lot it even looked like the gas gauge was working!

I called Power Brake Booster Exchange who had rebuilt the (wait for it…) power brake booster and described what I was seeing with the brakes. Their verdict was “sounds like something inside the booster isn’t right; send it back and we will take a look”.

So I did and they did.

And then I got the email. With pictures. The main hub is broken, not repairable, they don’t have any of these boosters and they don’t have any parts.

Broken main hub on power brake booster

The main hub is a plastic piece. A 60 year old plastic piece. That is fairly easy to break in shipping unless the brake booster is packed very carefully. Now I learn this…

OK, time to find a replacement. I went through my list of usual suspects for Imperial parts and got the same response across the board. “No, I don’t have any. These are really popular and hard to come by. They go really fast when I do get one.”

Krud. On a stick. With a side of rancid krud! Brakes are kind of necessary on a car. I’m rapidly moving back to a not so good day.

I posted a note asking for help on the Online Imperial Club mailing list. Someone suggested trying Murray B. Park, so I gave him a call.

He said that he didn’t have a ready to install booster, but he did have a rebuildable core. I grabbed that while I had the chance and asked him to ship it directly to Power Brake Booster Exchange. Apparently this isn’t the first time he has done this. He claims to know how to pack things so that UPS can’t break them. I pointed out that this is a rather bold claim. He acknowledged that I had a point…

Things are looking better than they did yesterday. This is a half step forward. As soon as I have a working booster installed in the car it will be a full step forward.

In the meantime I’m sitting here muttering under my breath “It’s only money. It’s only money. It’s only money. “

While waiting for (hopefully) good news on the brake booster let’s take some time for Yet More Workshoppery Storage. Or go straight to the next restoration article Chilling?.

Posted in Restoration | Leave a comment